Tuesday, June 15, 2021

0 Shred Shed - DIY Music Studio, Vol. 4 - Insulation

 When researching insulation, there were SO many options. In the end, I decided that spray foam insulation was probably my best option for sound, flexibility and coverage. The fact that it didn't need to be sealed in to look nice, in the case of the ceiling, was an absolute dream. I hate hanging drywall, especially on ceilings, and any other covering would have been cost prohibitive. 

I got a quote from a local company, and their recommendation to save some cash was to make my 2x4 trusses 5.5" deep by just nailing on some 2x6's to the sides of all of them. That way, they could use 5" of open cell foam on the ceiling instead of 3" of closed cell. Being the scavenger I am, I went searching for reclaimed 2x6's, and found them in the form of a free deck that someone tore out, where the surface was done in 2x6's instead of standard deck boards.

The owners allowed me to cut onsite so I didn't have to haul 16' boards home, so I cut them all into 8' lengths and loaded them into the trailer. I then had to remove all the nails, measure the joist length and determine the angle at the top to get them all cut properly. Because each joist wasn't exactly the same as the others, I had to measure each time to be sure I was getting a decent fit.


Along with adding all the 2x6's, you'll notice I also had to go around and patch up any cracks or holes that the foam might escape through. That included vents at the top of the shed, holes in the steel on the back of the barn, cracks between barn siding, the gaps between joists where it meets the wall, etc. The whole structure needed to be sealed. 

The spray went in 2 sessions over 2 days, and when it was complete, I was ecstatic at the results.


We're going to skip a little bit here, cause I want to cover painting the foam and do wall coverings in another post, so ignore the fact that in these painted photos there's suddenly wall coverings...

When I talked to the spray foam guys, their boss suggested black, but they warned against going that dark since it would collect dust as they've seen in the past. So I decided I wanted to run with a dusky blue to sort of mimic a night sky. Unfortunately, the blue I selected ended up being more Smurfs than dusk.


So all the time spent spraying this on with a cheap Harbor Freight sprayer was for nothing. To make matters worse, despite following all the filtering paint and post-job cleaning instructions for the sprayer, I ended up having to buy another one (cheaper than renting one at this point) because the original sprayer refused to spit out any paint. 

But the good news was that the new color, labeled Corduroy Black, was exactly the darkness I wanted.


Next time we'll talk about wall coverings and testing soundproofness. 

Wednesday, March 31, 2021

0 Shred Shed - DIY Music Studio, Vol. 3 - Roof, Siding and more!

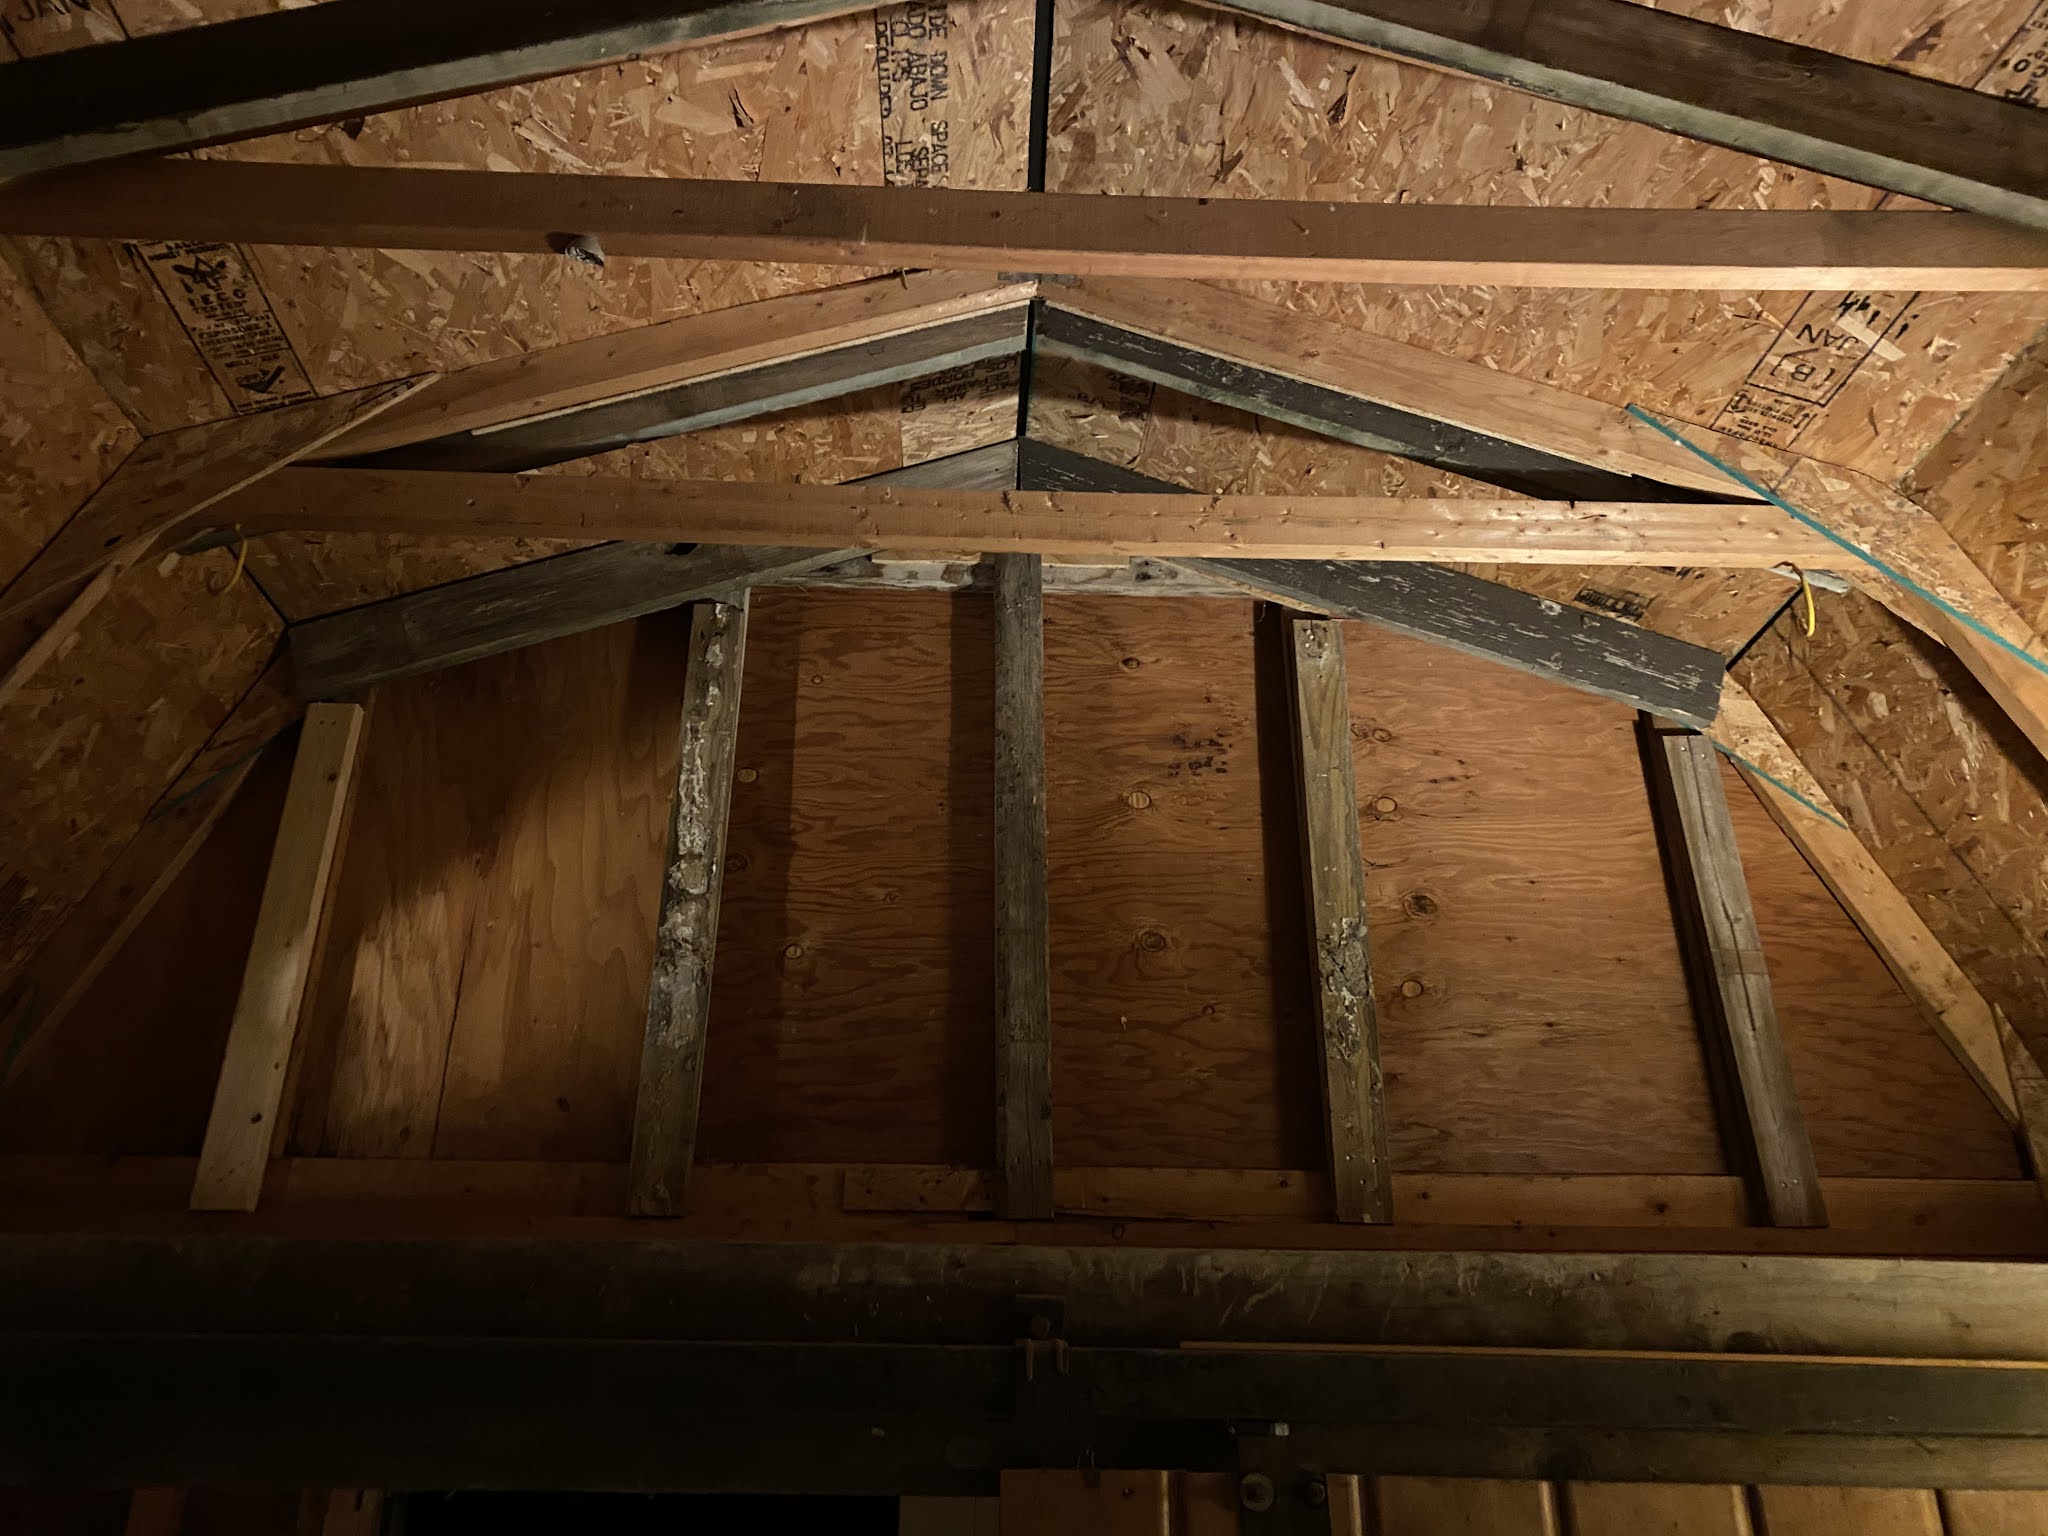
Mid July. Now that the walls were up, it was time to reconstruct the trusses. The trusses were made with true 2x6 beams nailed to true 2x4 top chords, with no webbing in between. The wood is super dense and heavy, just like the walls. When we took them down, they had to be separated for transport, cutting through the nails with a reciprocating saw, so before they were removed, we labeled each piece with a number for reassembly.

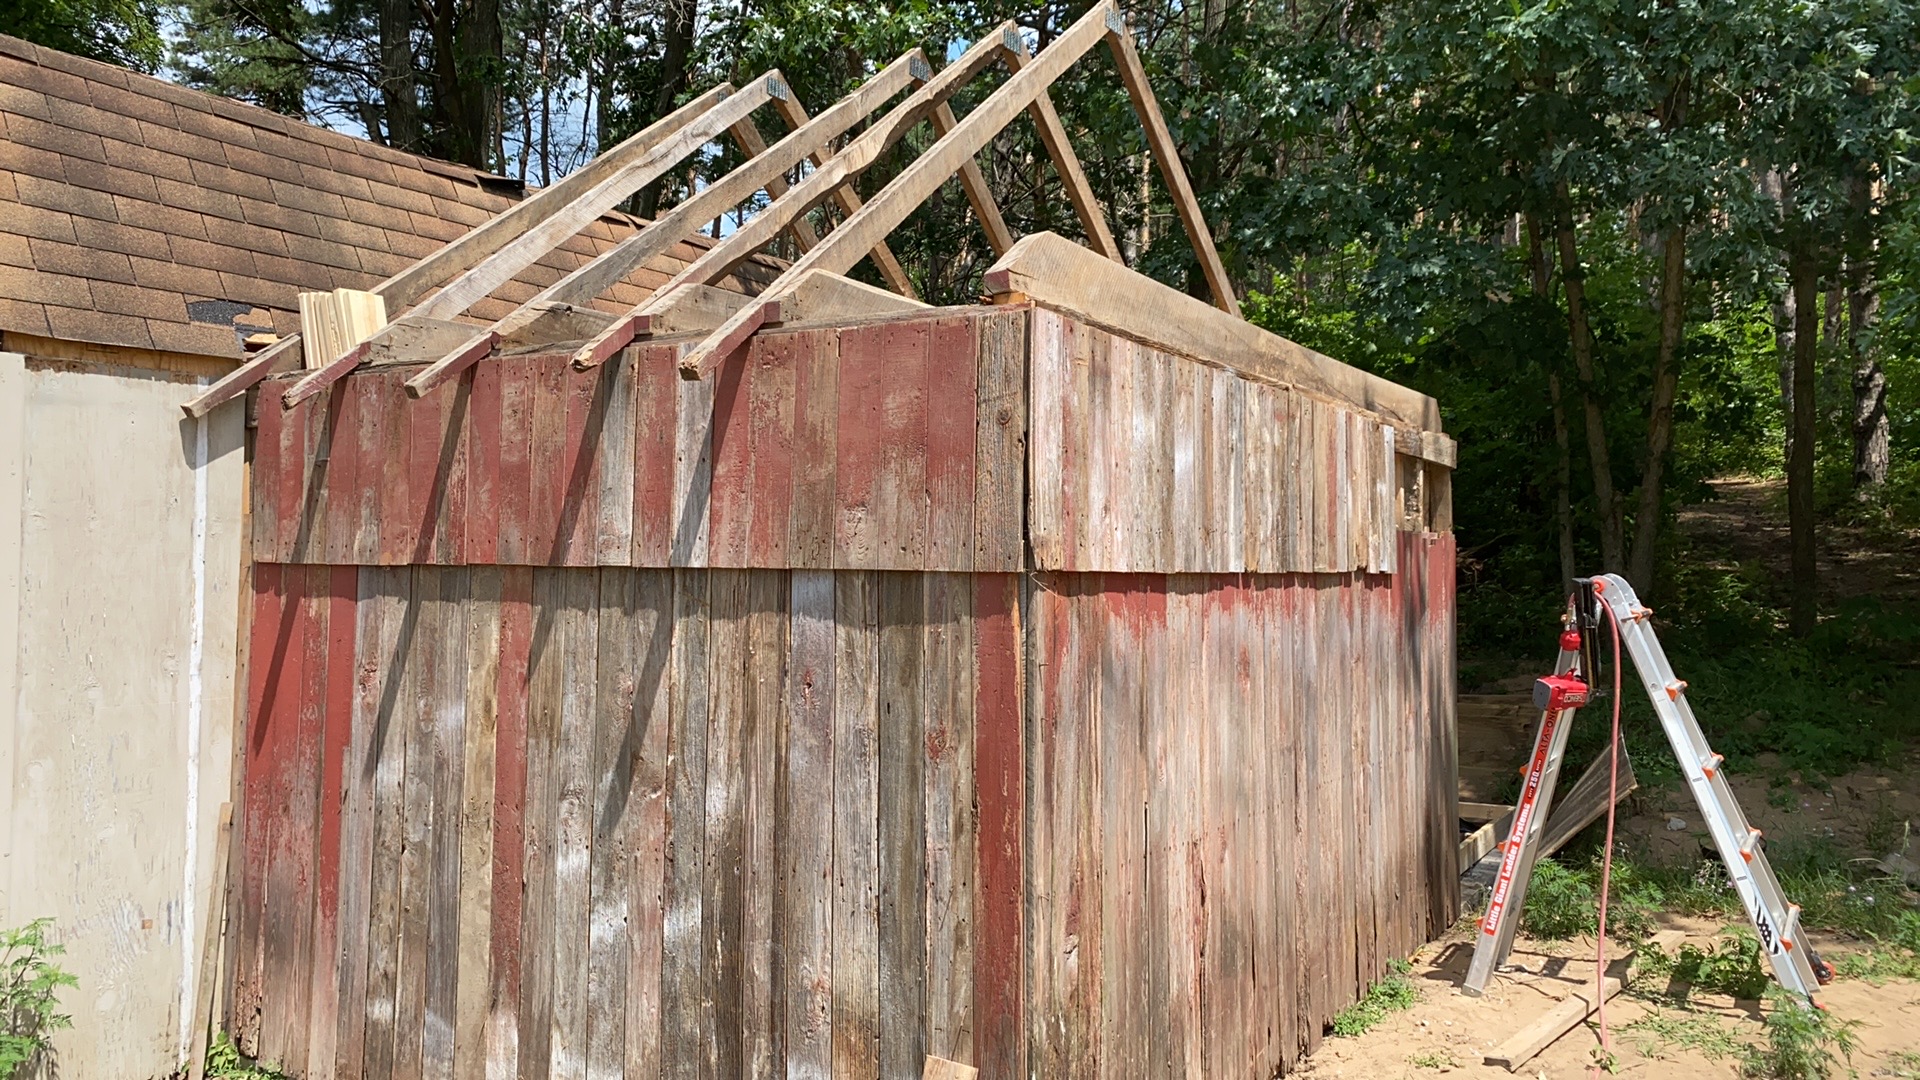
I started by putting each beam up, as lifting an entire truss was just not possible. Because of where there used to be windows along the front wall, the spacing was not 24" on center all the way across, so I just did the same with the beams to keep them on the vertical studs.

I could do the beams myself, lifting them up on one end, getting the ladder to the other and lifting into place, and then toenailing into the headers, but the trusses were just too big and awkward to lift into place. So until I could get some help, I worked on filling in the siding. 

On a traditional barn, when they have boards on the gable wall, they don't bother adding anything to the wall to make the boards overlap the bottom wall covering, but I wanted mine to actually remain straight up and down, so I added 3/4" of material across the top of the extension wall so that when I nailed in the extension siding, it was straight up and down. 

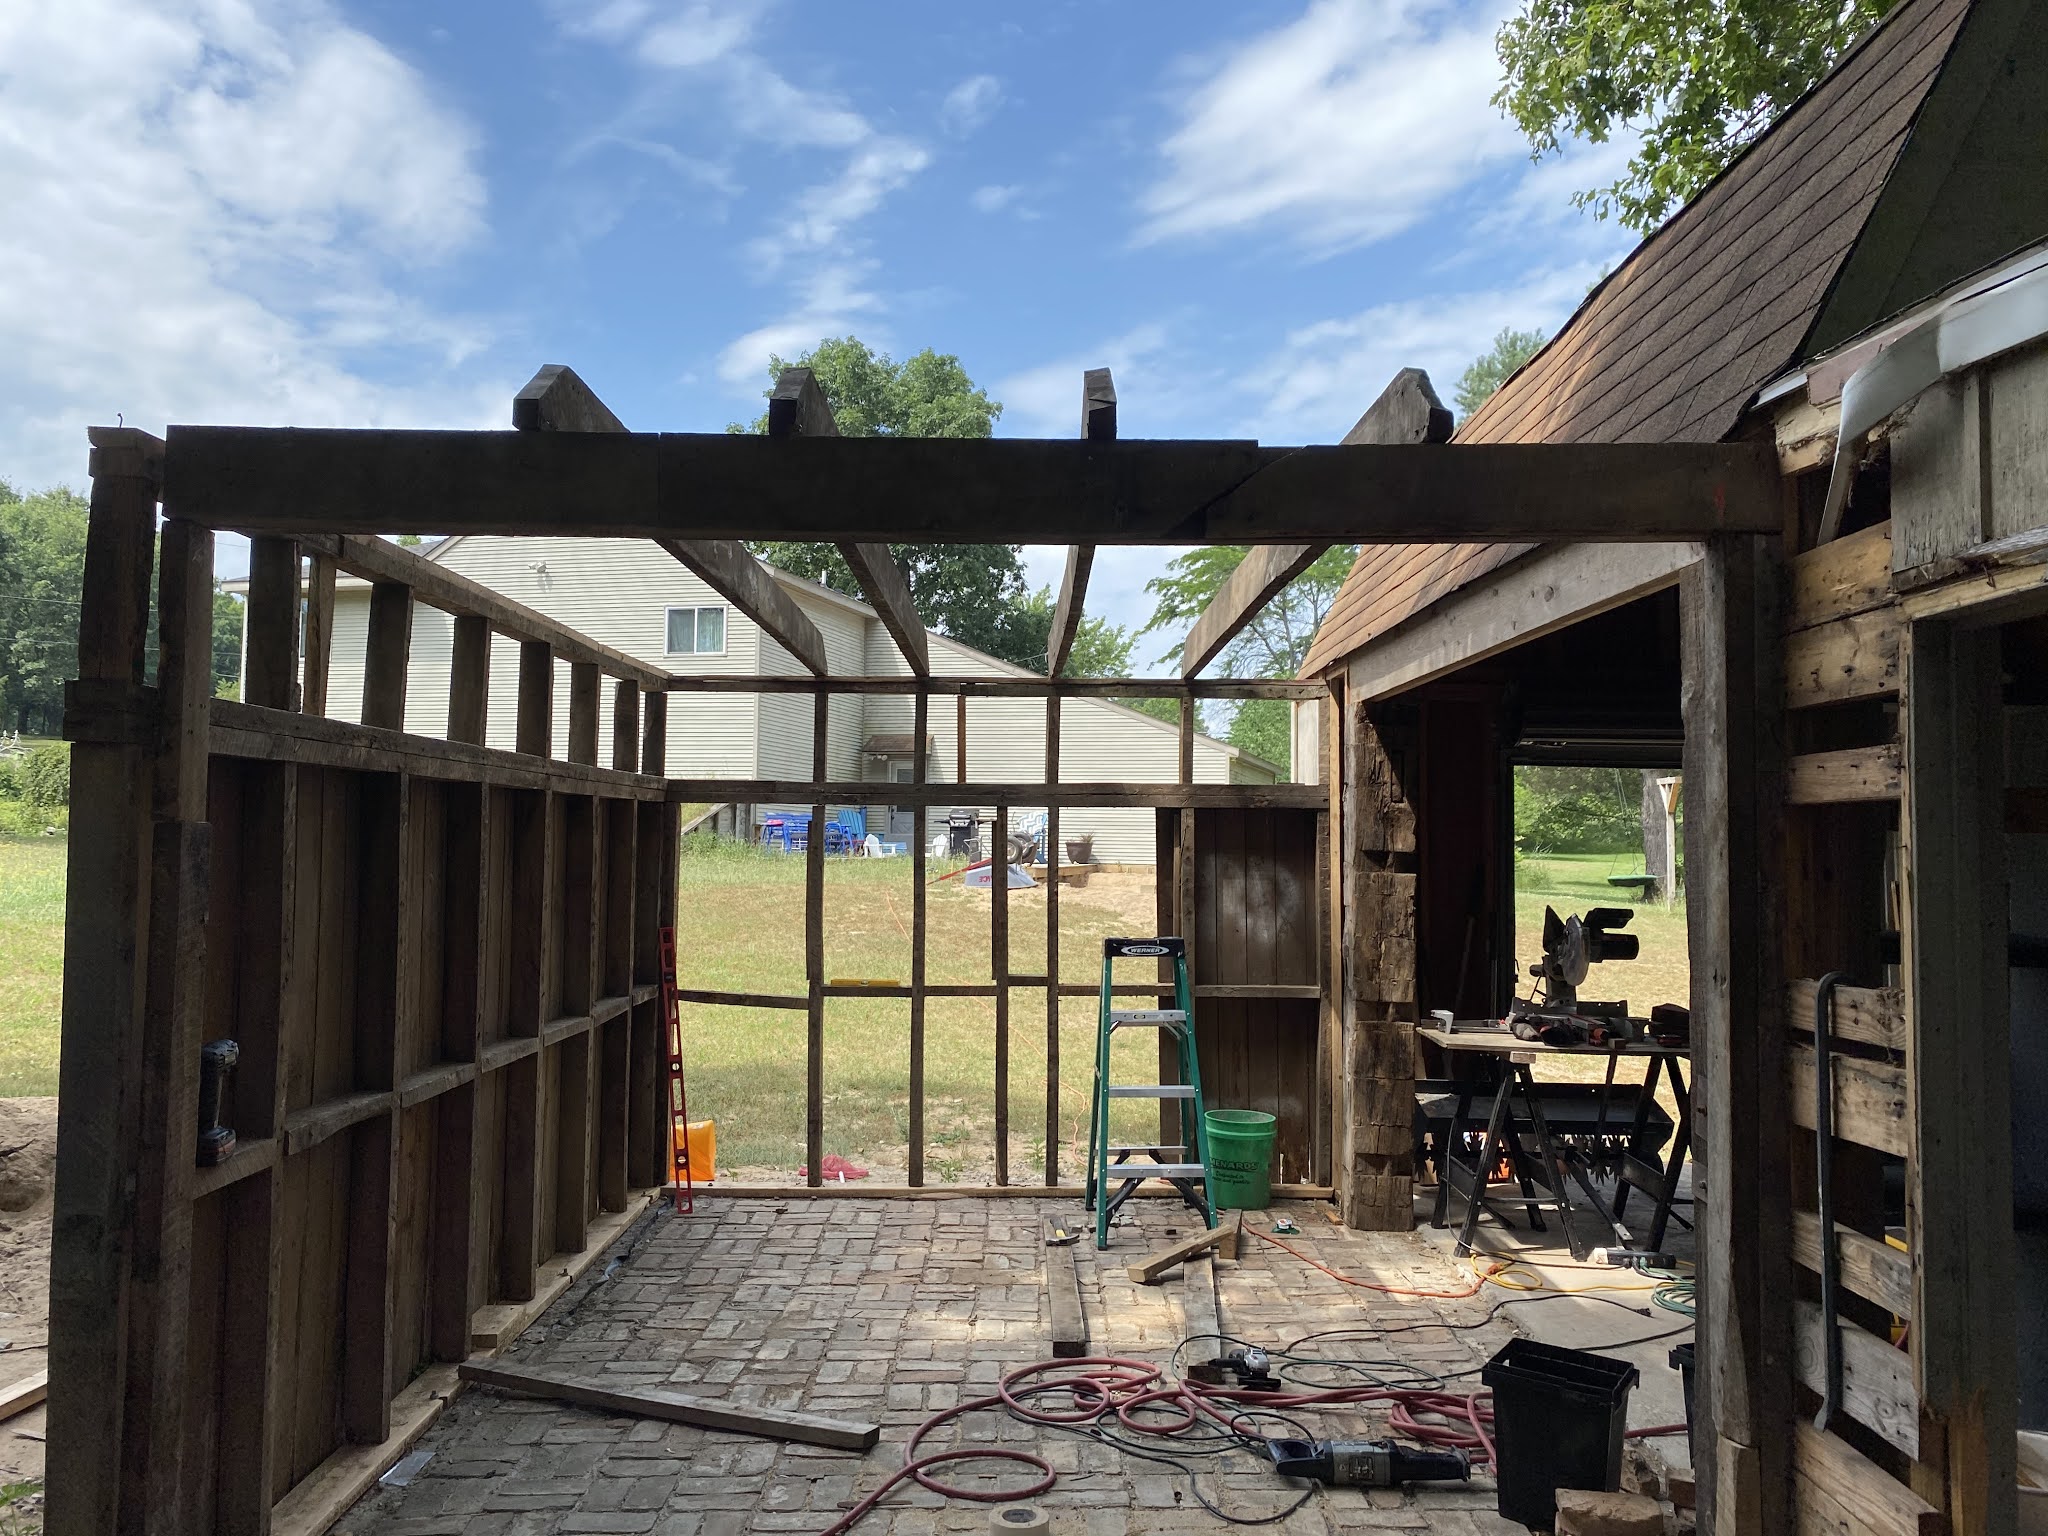
Within a couple of days, Matt was able to come over and help me lift the trusses into place. I measured the distance at the bottom of the truss pieces to make sure they were at the right angle at the top, nailed them together and added mending plates for extra security. 


We weren't able to do them all at once, so over the next week I had both Becky and Trevor helping as well, and soon we had all of them up.

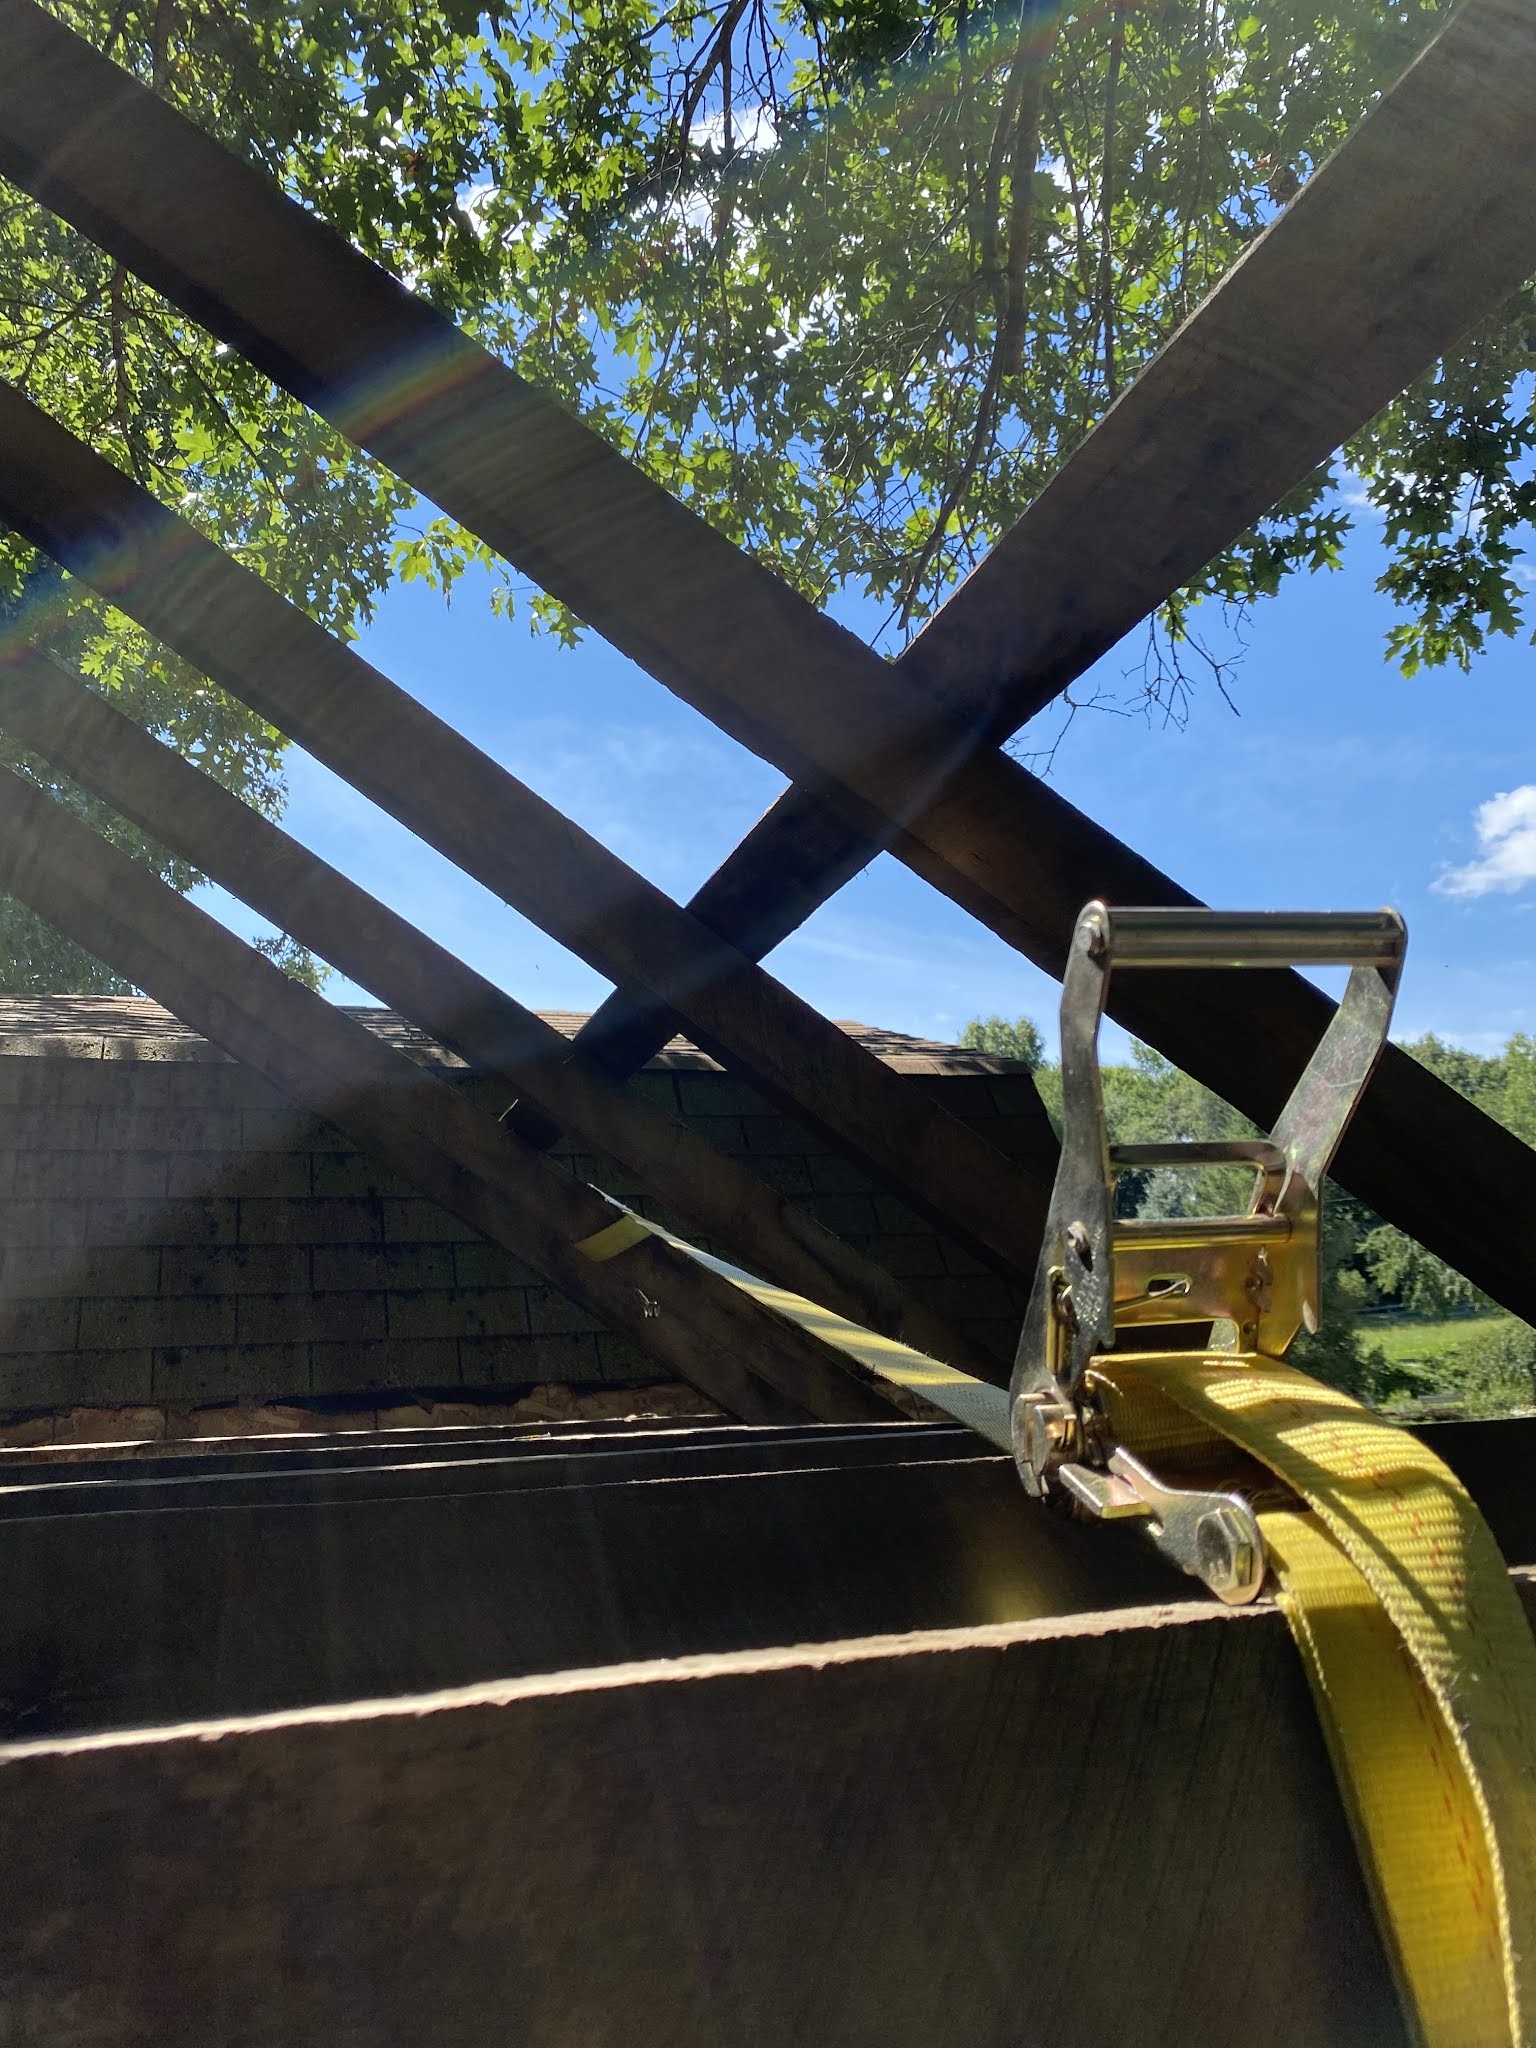
You'll see a cross piece in above, and that's after making sure each was vertically level, we added a 1x4 to keep them in place so that when we did the roof sheeting they were straight up and down. In some cases, that required some motivation in the form of a ratchet strap.

I fixed one end of the strap to the outside wall, and then tied it around the truss and cranked it down till it was upright, and then screwed in the 1x4 cross piece to hold it in place.

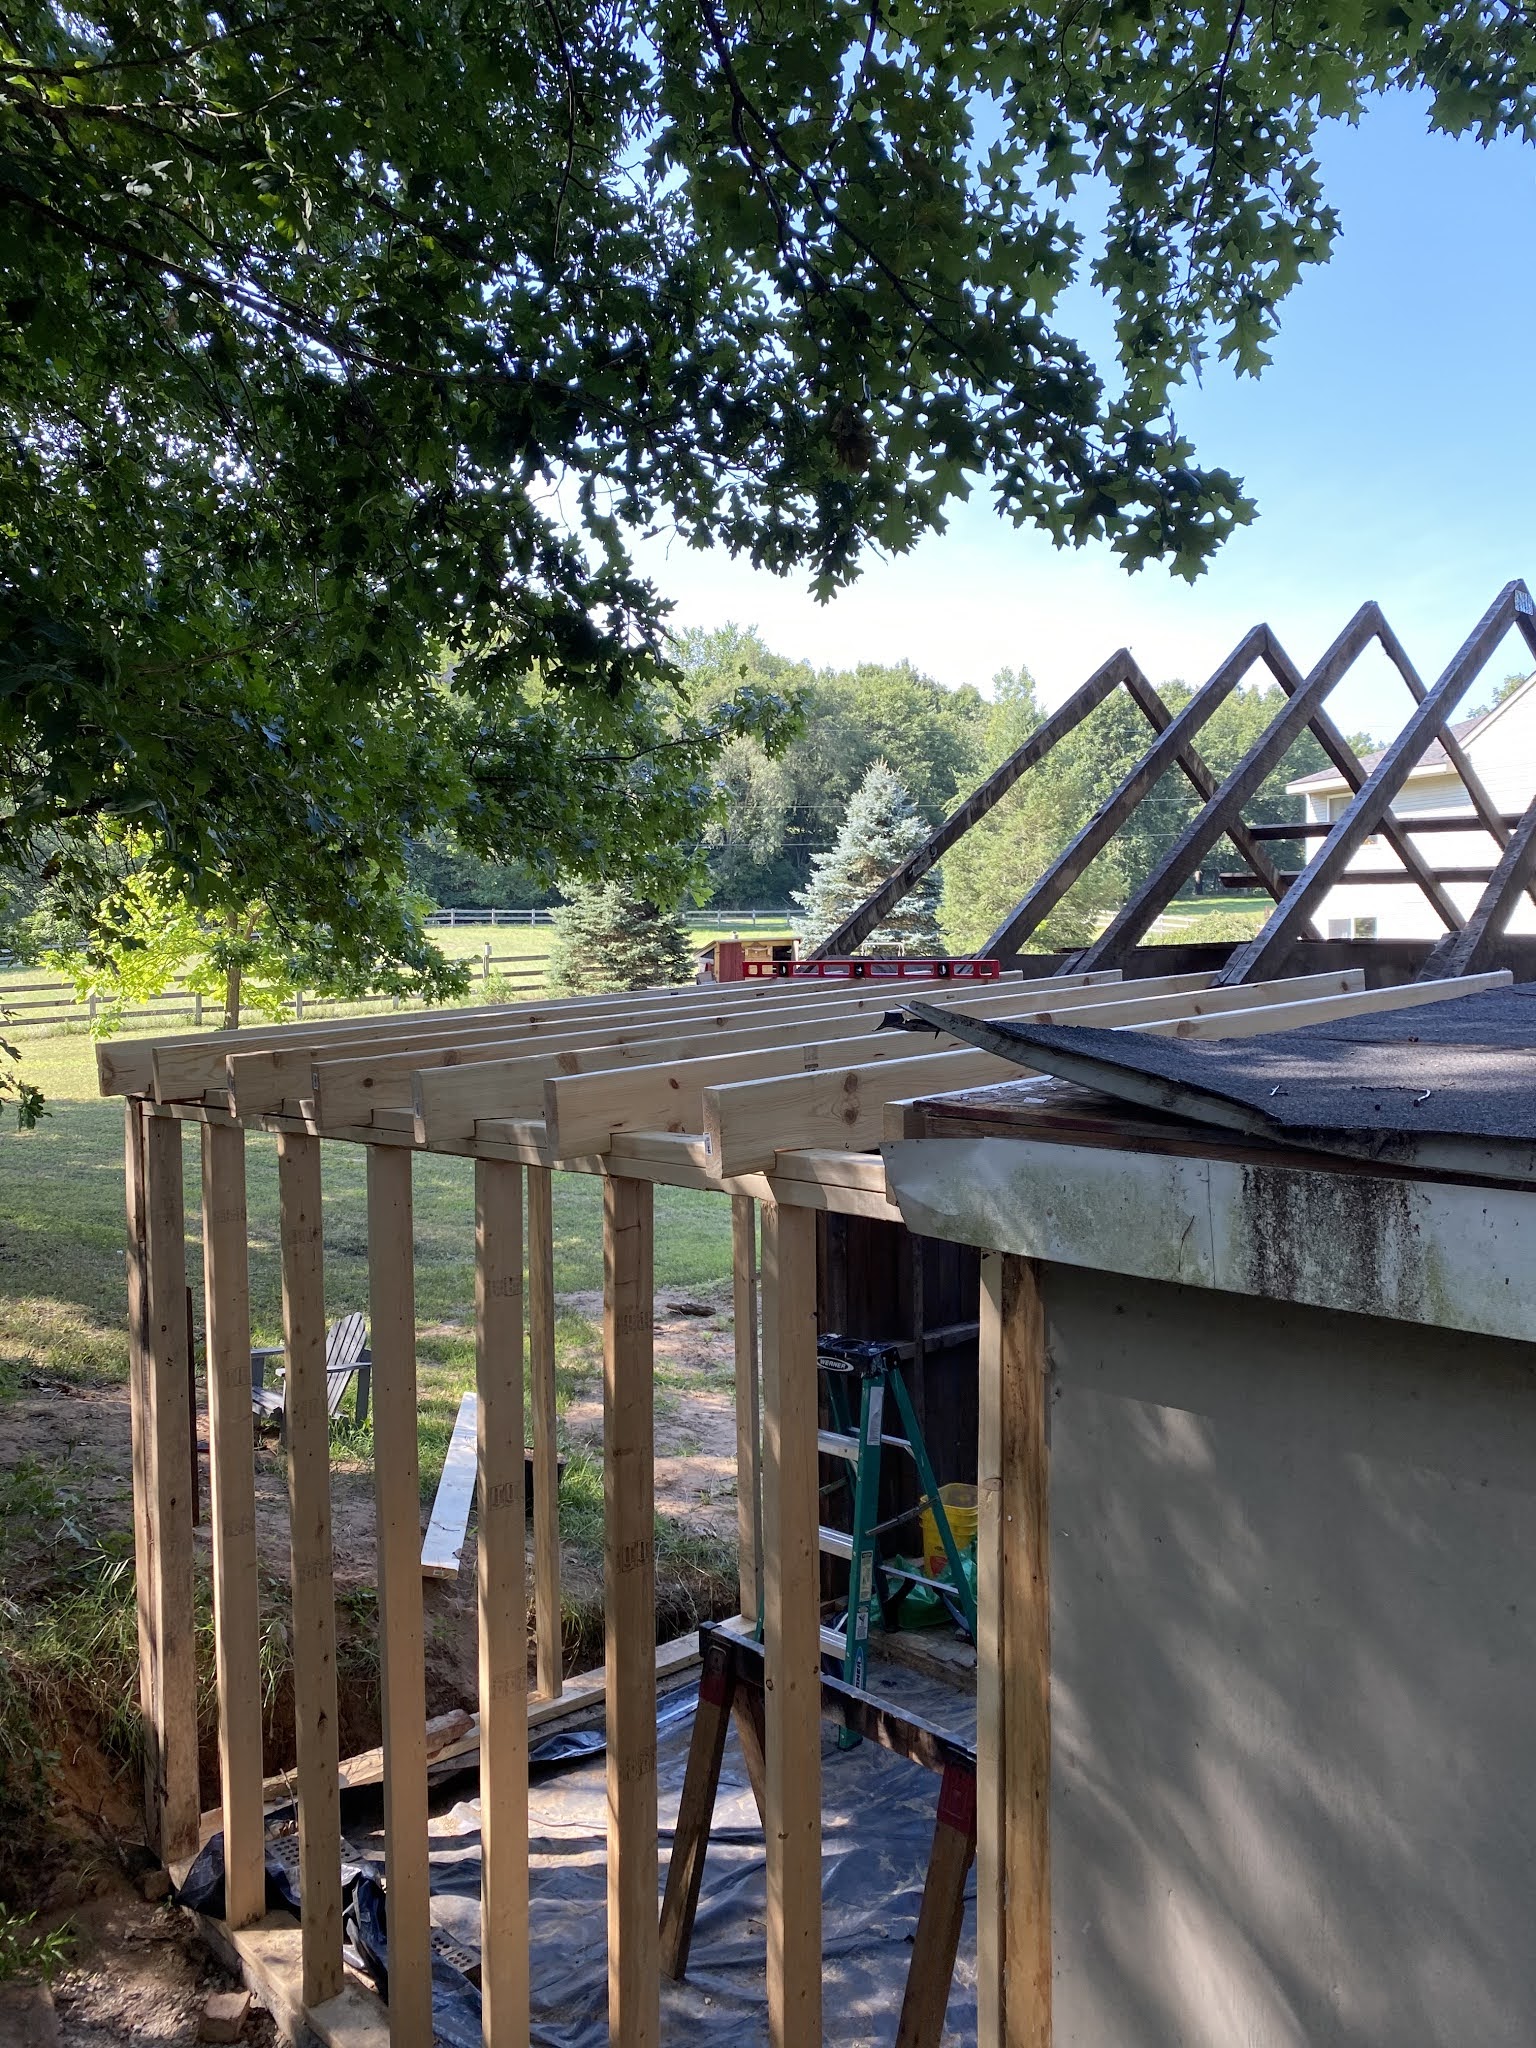
With the main trusses in place, it was time to build the back additions and monopitch roof to match the shed's back section. This is practically the only part of this project I bought new materials for that aren't fasteners. The walls are just standard 2x4 and the joists are 2x6, everything 16" on center. I notched the 2x6's out to rest on the cross beam so that they would match the height of the shed's back section roof so I'd end up with one flat platform all the way across. Initially I thought I'd make them lower than the middle, to just make them match the height of the beam, but after consulting with my roofer, it seemed like just another leak point to have two different heights, so I did the work to make those joist notches.


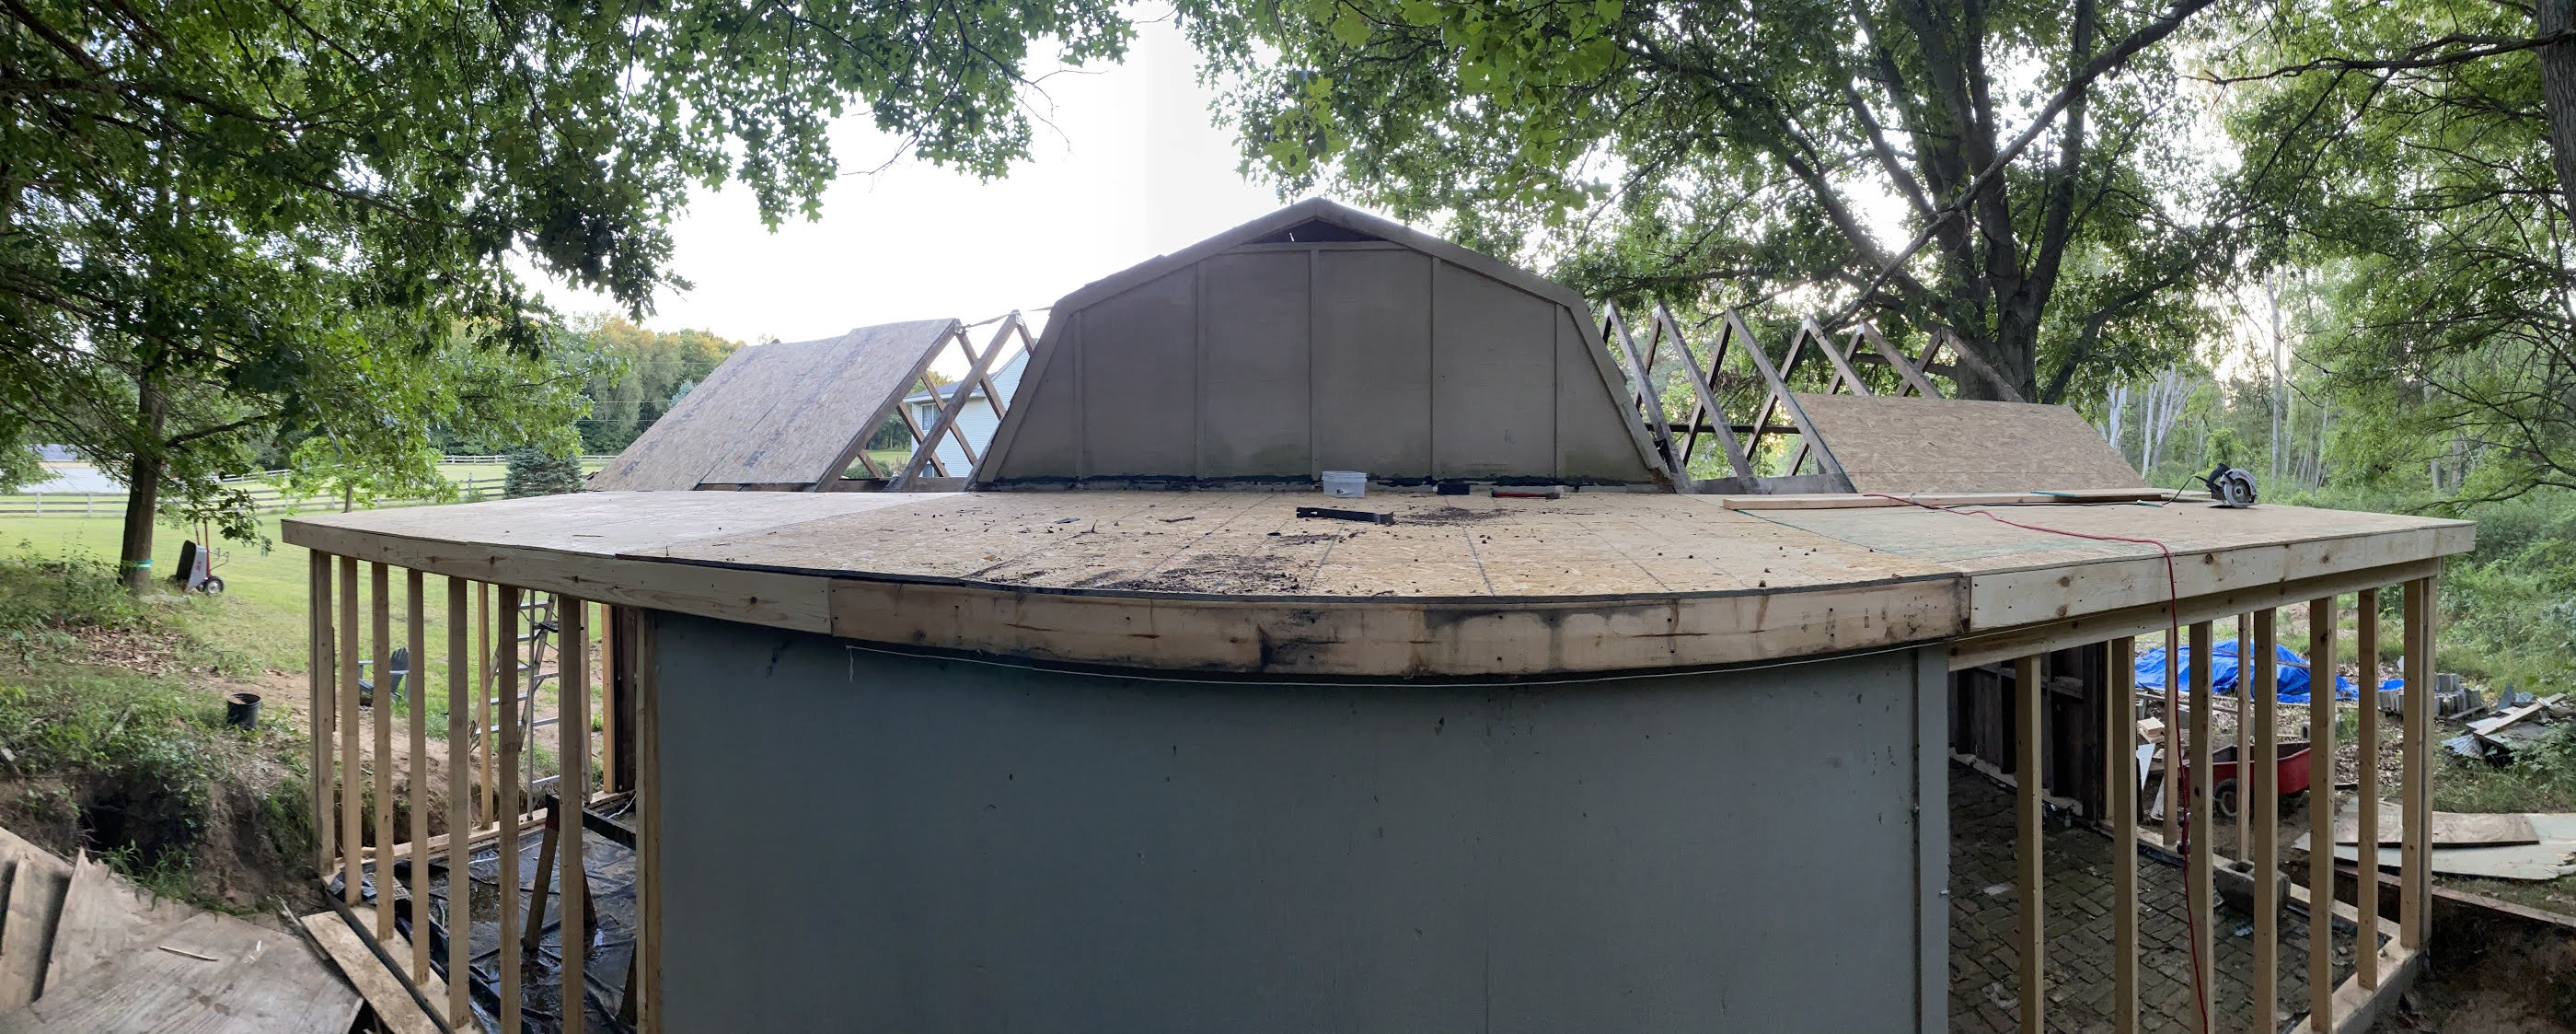
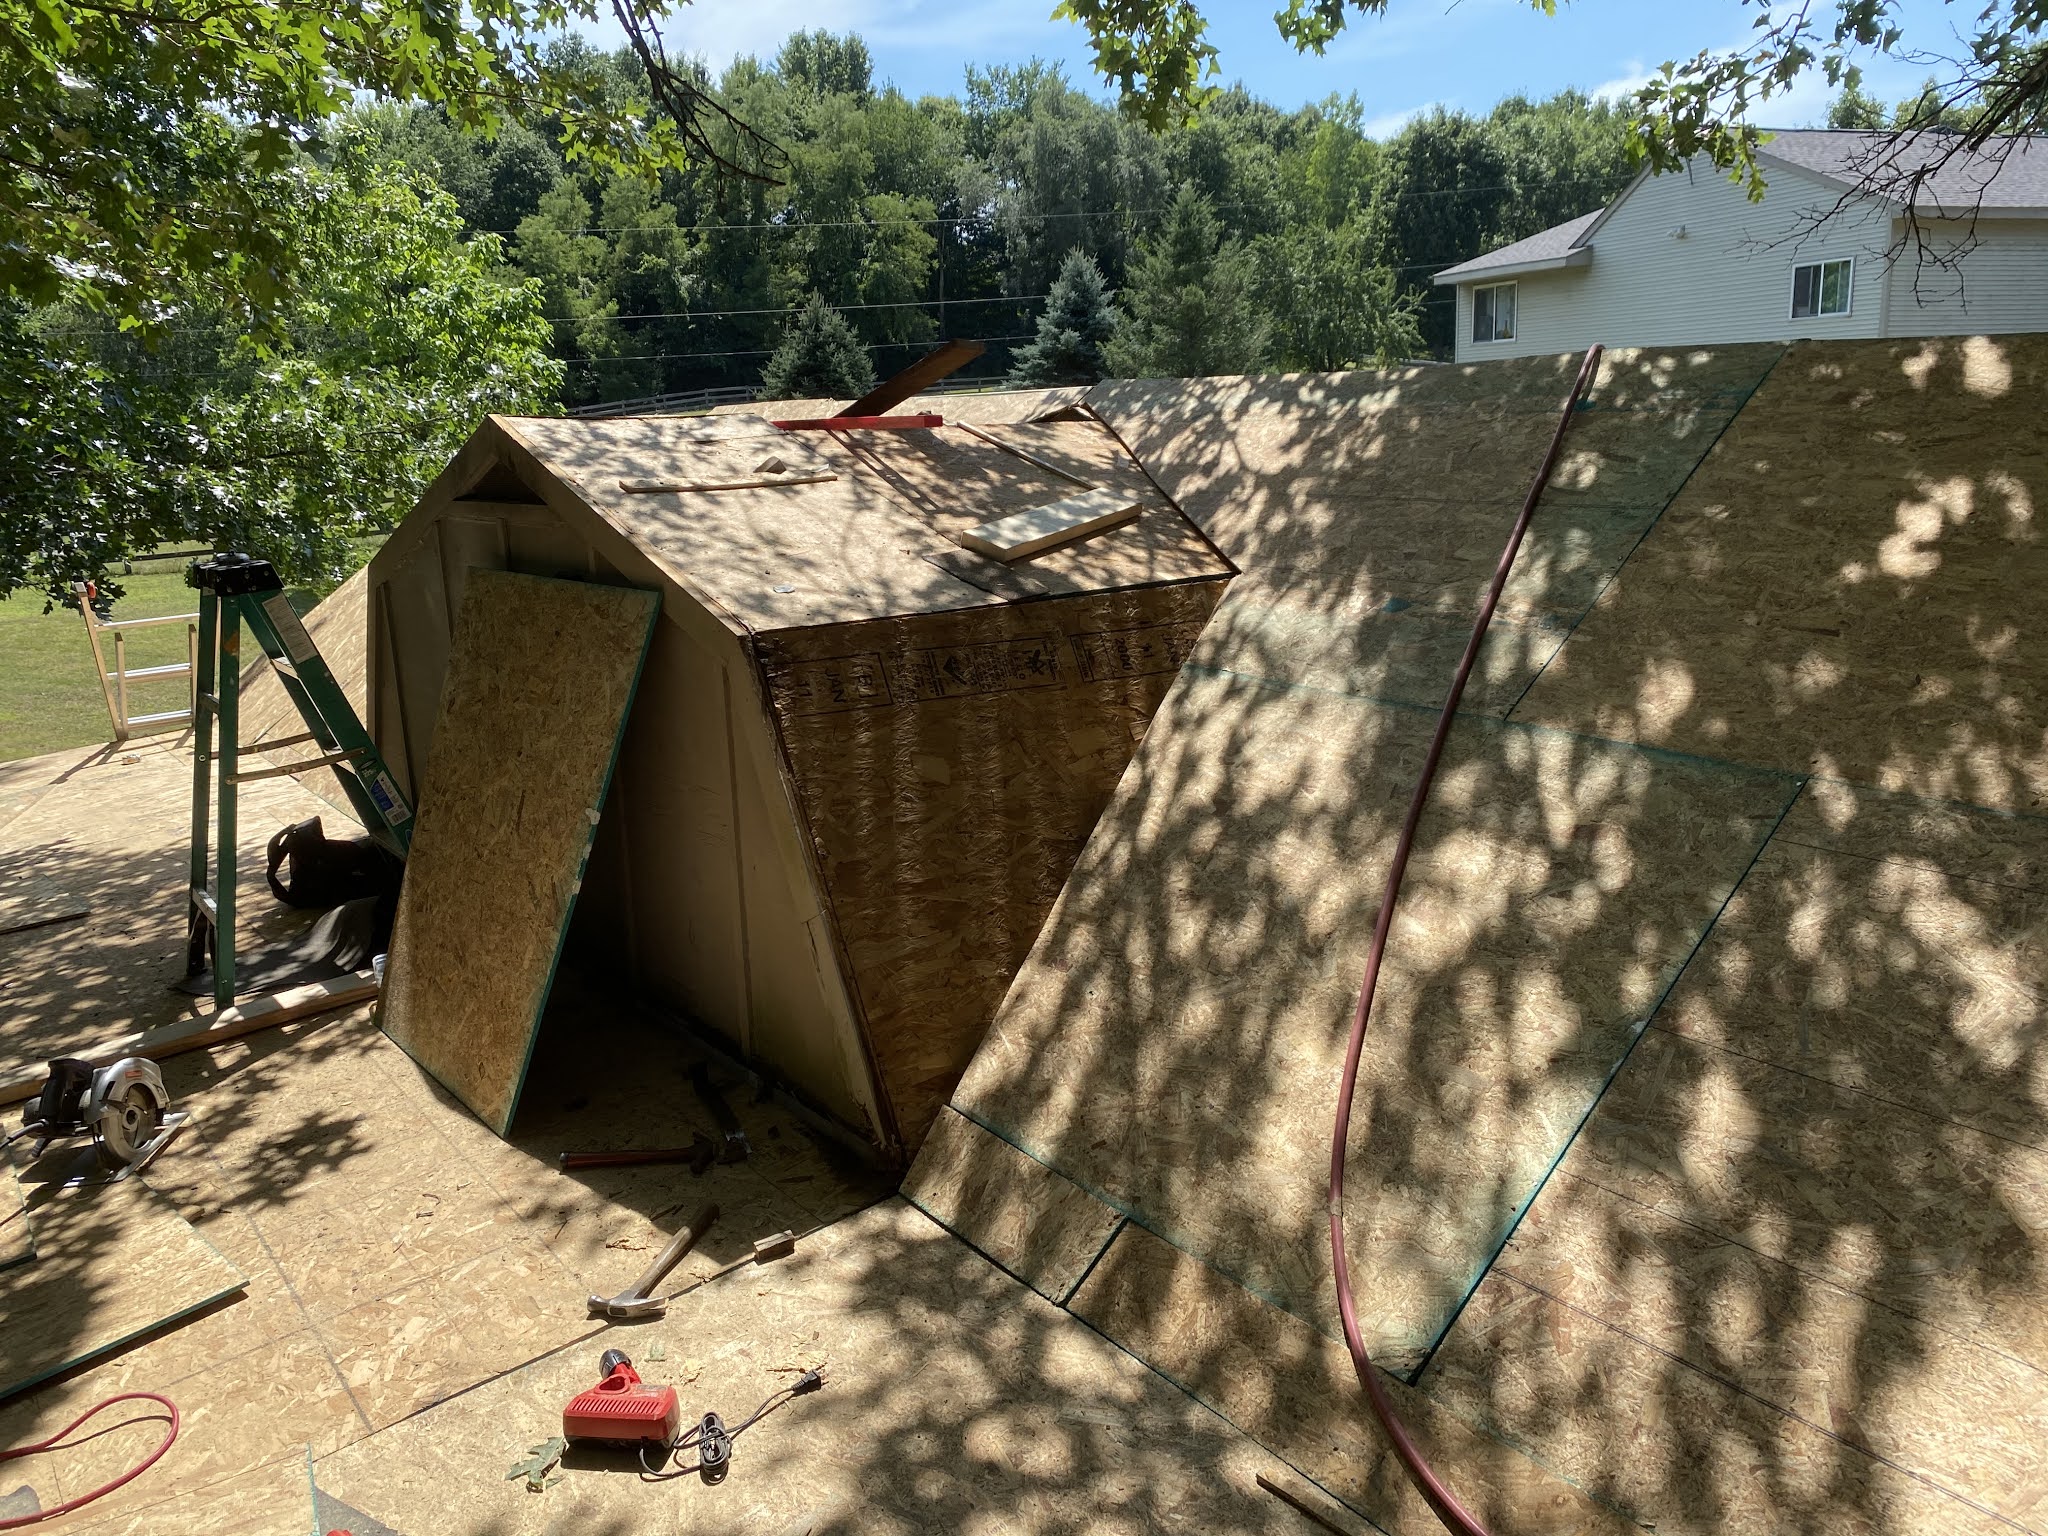
With all the framing completed, I bought all the roof decking and started putting that up. I knew I'd need help from Kole (roofer) to tie into the shed, and to put decking on the side where there was nothing to stand on, so I just did what I could to start.


By the end of the next day, Kole had tied into the existing roof (myself being ECSTATIC that the roof line of the barn parts was almost exactly the height of the shed, and therefore my calculations weren't way off) and we'd sheeted the whole thing.


Next day he came back and dried it in with ice & water shield and underlayment to protect it till they could get the shingles ordered and delivered.


While I waited for the shingles to come in, I capped the ends of the barn with exterior plywood and 1x2 strips.


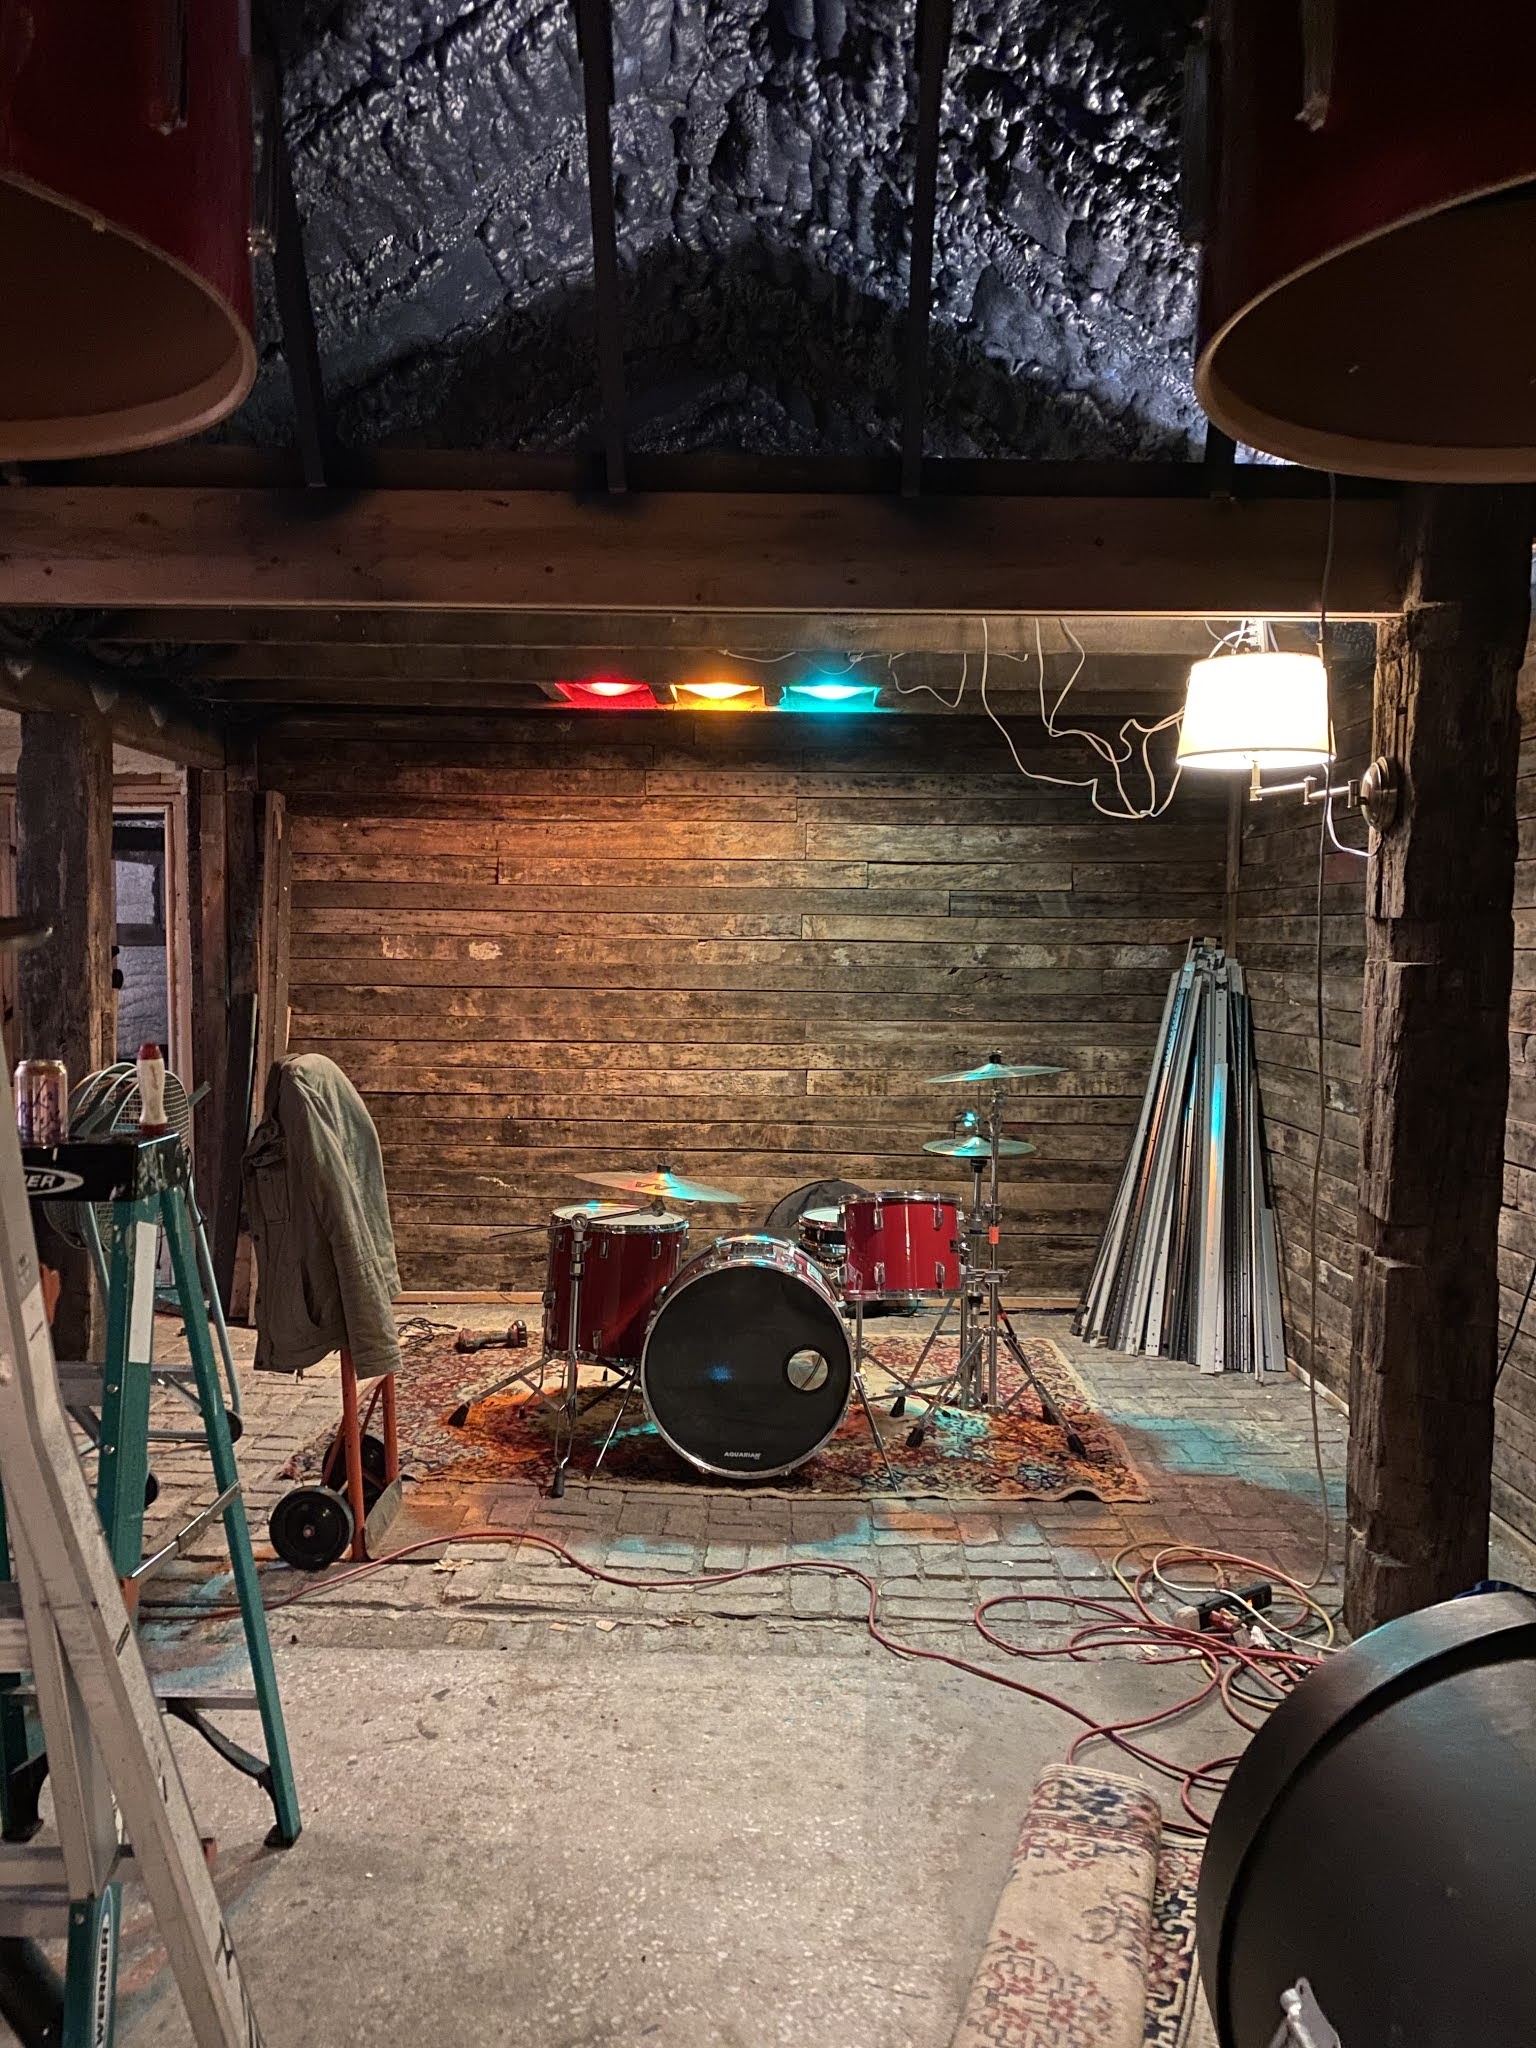
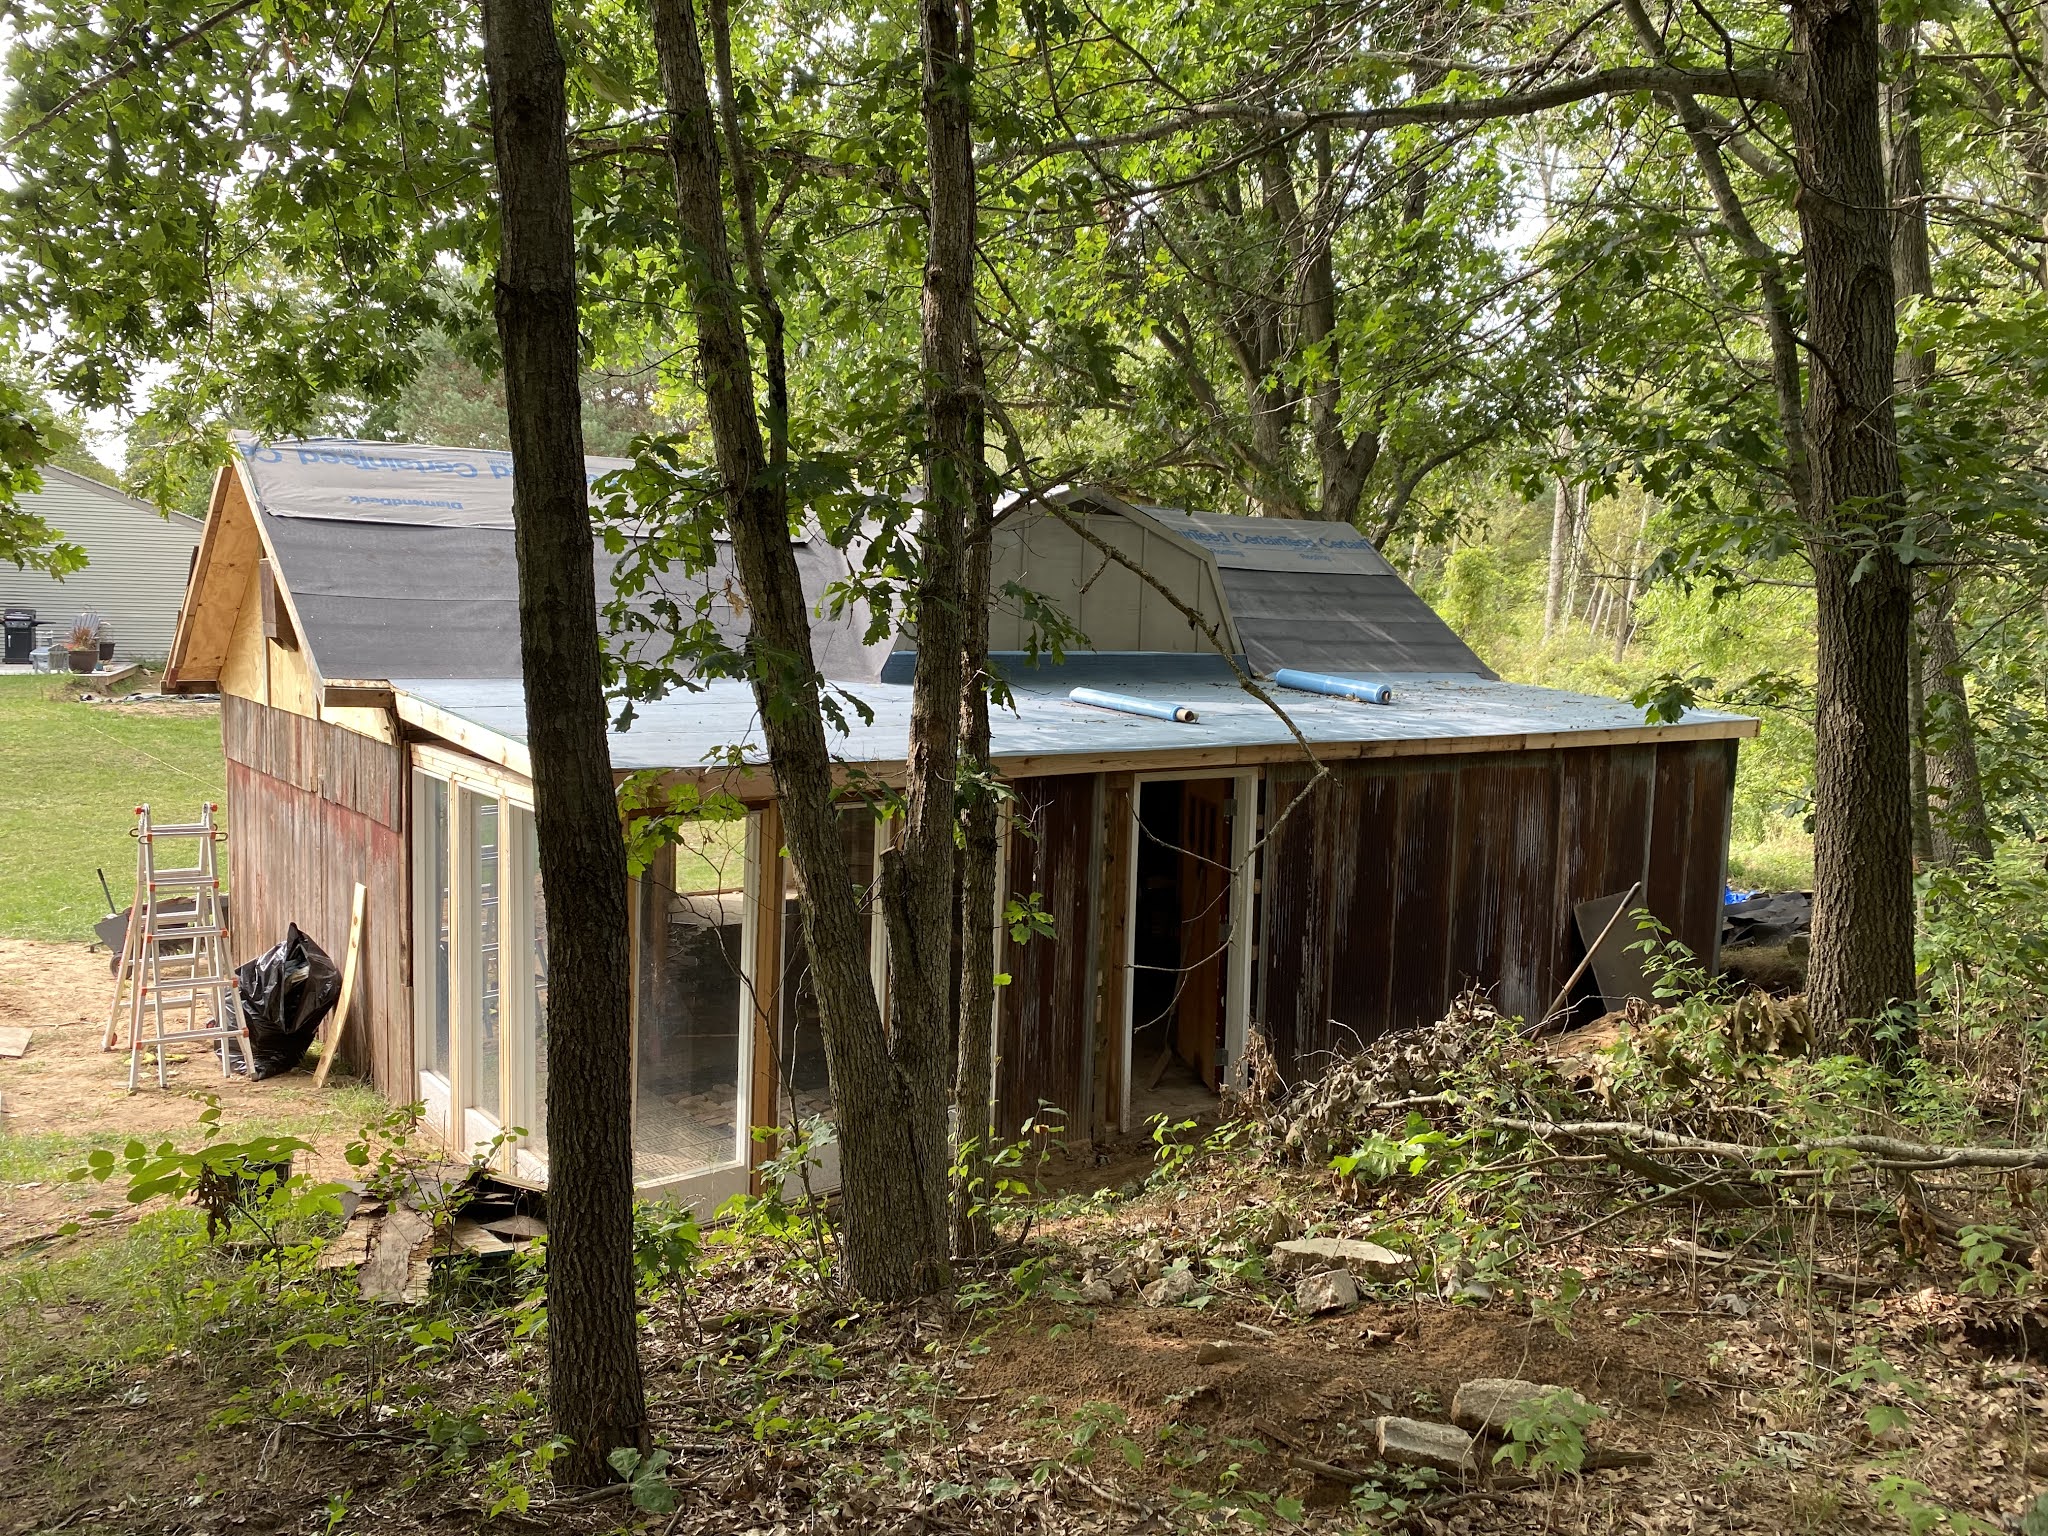
To keep sealing things in, I also started putting up the old metal roof as siding on the iso room. Since I was doing spray foam, I didn't bother putting wood under the metal roof, I just made sure all the holes were covered with duct tape (the kids helped!) and that everything was nailed in tight.


At first I was going to leave the old wood panels on the control room, but seeing how cool this looked with the metal, I decided to keep it going all the way across.

I was also agonizing over what to do with the walls of the lounge. Seeing it open at the back had me really wanting to put windows in. I had a couple crappy windows I picked up from the side of the road, but they turned out to be pretty broken. I also wanted to put the door on that side, but it would end up a little below grade, which is never good. 

As luck would have it, I saw an ad for (6) 6' tall double pane windows in wood frames for $120. That's $20 a window. Unbelievable. I messaged the woman and she said they were at a garage sale, so I booked it over to Wyoming and she gave them all to me for $100. 

I got them home, reframed my back corner, and decided the door would be in the control room and off the back instead of the side. The height of the windows was exactly the height of the wall minus 1.5", which is (you guessed it) exactly a 2x4.


Knocking the back wall out I added the rest of the metal and added the door frame from a 36" steel door I'd purchased from Craigslist.


I swapped the steel door with a super heavy wood door from the 60's I'd also found on CL, and the back was nearly done.


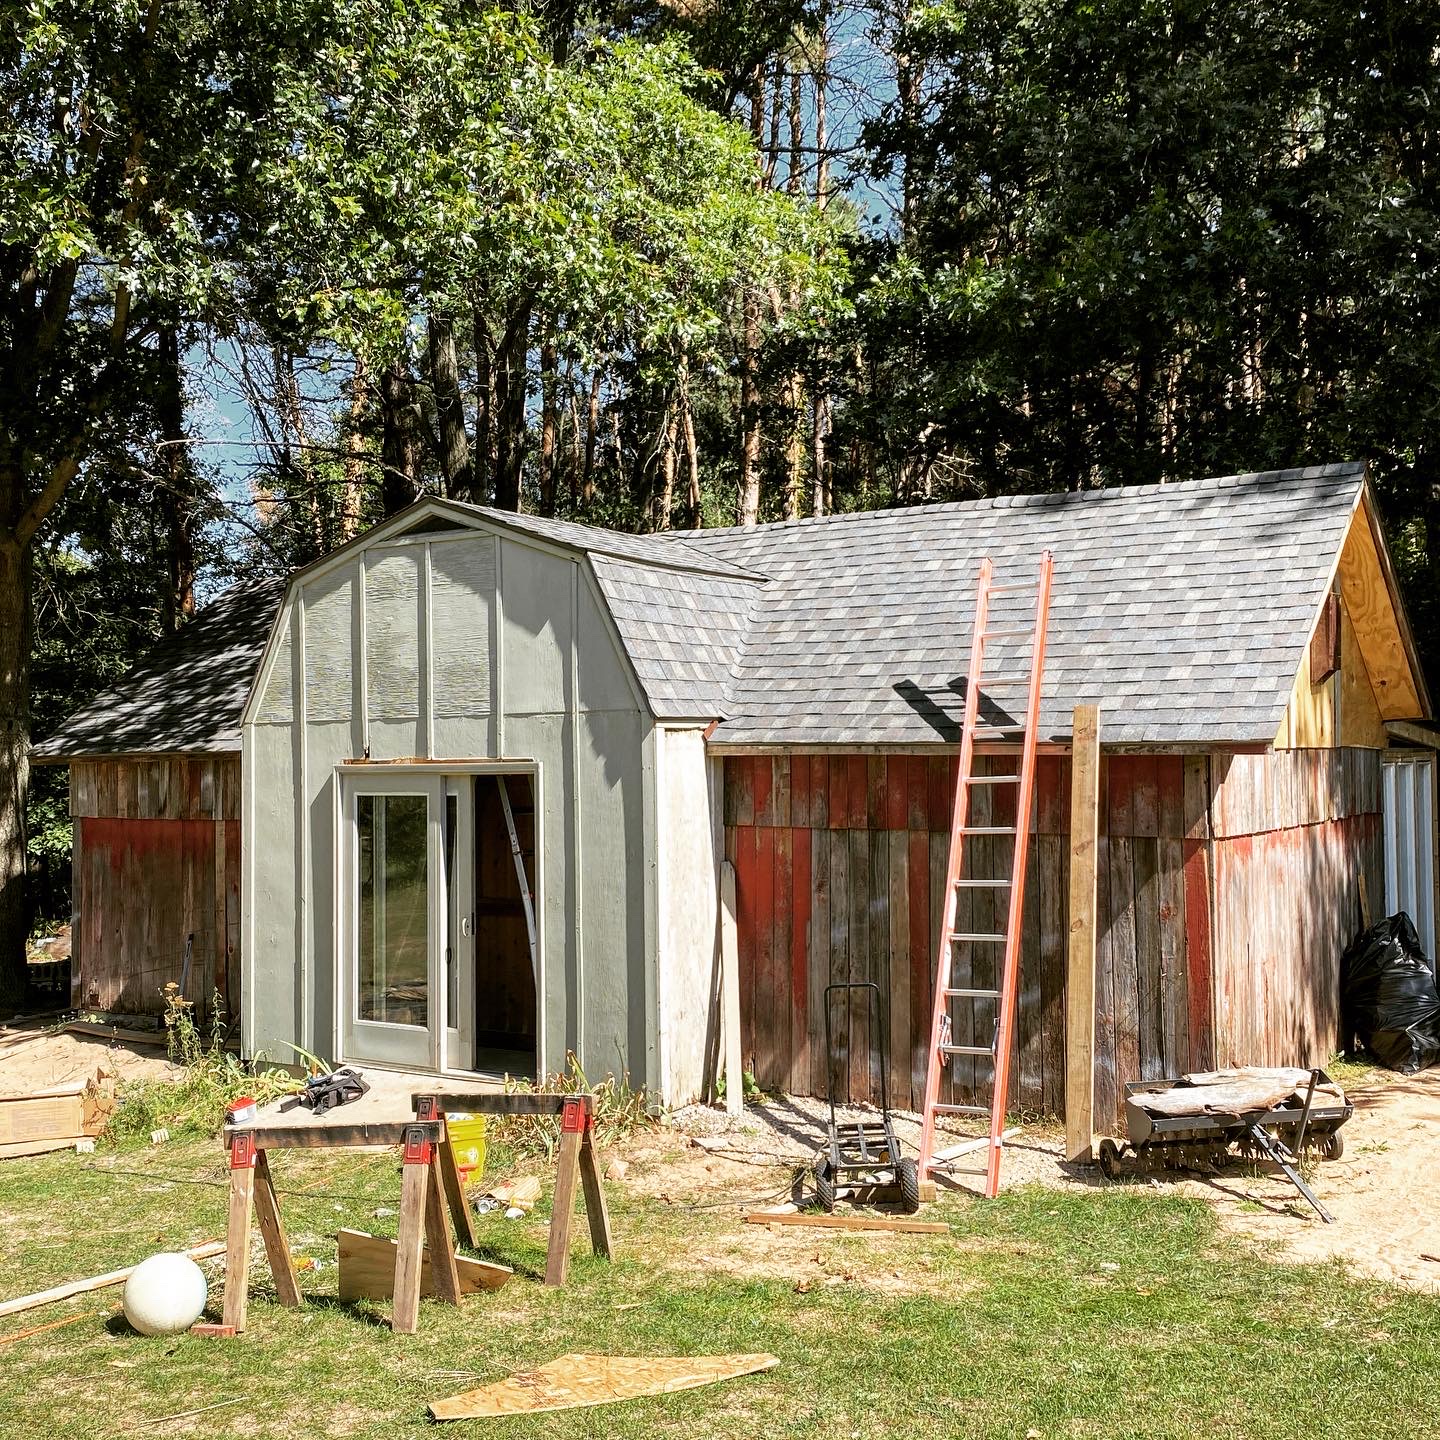
At that time, the shingles showed up, so Kole and Taylor came back to finish that job. To marvelous results


No one will ever notice when in the space, but because the last stud on the barn wall had a bit of a lean to it, so did the wall I built off of it, and therefore the back wall kind of angles out from the control room to the corner. It was fine in the end, but always check your levels, ladies & gentlemen, lest you end up with this same problem.

Next time - insulation, plus all my interior wall woes.


Tuesday, October 27, 2020

0 Shred Shed - DIY Music Studio, Vol. 2 - Walls

On nearly every project I take on, there's at least one thing I've never done before, and depending on the consequences of doing it wrong, I'll do various amounts of research and fretting and weighing different options. In this case, that thing was taking out walls. Which, if done improperly, would have been disasterous.


Here I stood. Over and over again. Looking at the side. Looking at the rafters on the inside. Thinking. Fretting. Until I finally just decided I had to start somewhere.

Originally, I wanted to create a barn beam opening, where there were two 7' barn beam posts supporting a 14' barn beam header. Now, I don't know if you've ever lifted a barn beam, but there was simply no way to lift such a structure in place without heavy machinery or a bunch of people on ladders. The loft in the shed that I removed was created with (5) 2x12's, all 12' long. Although I wanted 14' openings, 12' was what I had, and they were lightweight and easy to install myself. So in the spirit of upcycling, I modified the plan. I took (4) 8' barn beams and used a circular saw to cut out a notch (basically make a bunch of cuts 1" or so apart and use a hammer to knock them out. Works wonders.) the size needed to put (2) 2x12's on each wall. I then stood the posts up into position.

I now had to support the trusses to prep for wall removal. I had some leftover long 2x4's laying around, and some not-so-long that I nailed together, and shoved them up against the joists. I tapped them with a sledge on the bottom just to make sure they were secure enough and wouldn't slip, then went across the wall, removing each 2x4 stud with a sawzall. With each stud removed, I would stand back and look at the wall, the ceiling, listening for creaking or any sign of collapse. It never happened, and the wall was removed without incident


I then quickly grabbed the 2x12's and lifted them into place, using 3" screws to connect the first one to the post, and the second one to the first one. I then carefully removed the supports and everything held fine! The last step would be to nail the trusses to the header, which I do later using a framing nailer.


The second wall was much easier and less stressful, having done it once and knowing what to expect.


This got me excited to finally put some barn walls up! I called some friends and got them to agree to lift these stupidly heavy panels into place.


At this point, the walls had been sitting on this trailer, under tarps, for nearly a year. I pulled out Matt's angle grinder and set to work grinding off any rogue nails (there were a lot of them) and then pulled each panel off to brush off and vacuum out all the random dirt, animal fur, beehives and whatever else had accumulated in the walls in the 100 years they stood.

I then measured the size each wall needed to be - (2) 10' walls joined at the corner with (2) 14' walls. The baseplates on all the walls had rotted to nothing as well, so I replaced them all with new 2x6's. Then I measured the location of each J-bolt sunk into the concrete blocks and drilled holes where we would drop them onto the bolts.


Couple of quick notes - I mislabeled the walls so originally we flip-flopped them and had to swap them back after re-drilling holes wider thinking I just messed up the measurement. Secondly, I ended up just cutting out a notch where the J-bolt holes were to more easily drop them onto the bolts. These walls were EXTREMELY heavy, so even small adjustments were very difficult. Even with 5 people on a wall, those 14' walls were a struggle. BUT, we got them all in, and I was ecstatic.


As the barn stood originally, there was a 6-10" lift from the concrete foundation, making these walls 6' at the rafters. Being that they're on the ground level here, they were just under 6', so my next calculation was to figure out how much I needed to add to get the peak to match the peak of the shed roof.

I measured the distance from the floor to the peak, and then reassembled one of the truss pieces to determine the height, and then I was able to determine the actual height the wall needed to be, which was about 7.5 feet. FINGERS CROSSED.

I used the extra wall sections to both fill in studs on the side where there was windows before and to create the extension. I figured I'd just use some framing nails and a hammer to build the extension. BOY was I wrong. Every nail I put in would go about 1/4" in and start to bend. 100 yr old hardwoods are essentially rocks.


I went out and purchased this Senco FramePro, along with some 3" framing nails and some 2" exterior galvanized nails (knowing I'd need them to reattach siding pieces). Till this point I'd only used a brad nailer on new lumber, so I was used to about 85-90 psi. The first time I tried that with this wood, the nailer about took my arm off jumping from the board. I ended up at about 130 psi, which is just insane to me. But, it made quick work of building the extension. 


I'll finish with a little rant - with these sorts of projects, always keep any scrap you can on hand, and constantly check for level. I had to do a lot of patching and revising and recutting to make things square and level, and even then, it'll never be quite perfect, not like new built. BUT, we'll chalk that up to "character"!

Next time - trusses & an actual ROOF!

Wednesday, October 14, 2020

0 Shred Shed - DIY Music Studio, Vol. 1 - Foundation

 Last July, we tore down a 100 year old barn in Lake Odessa, MI to be repurposed into a music studio. This is the first part of a long journey in creating our own music space.

As with anything, we had to start with a foundation. I had decided that instead of just rebuilding the barn as it was, I would take the pieces of it and add it on to our existing shed. The shed has a front section that is 12'x16', and a monopitch back section that is 10'x8'. The barn was 14'x28', so the plan was to create two 10'x14' "wings" off the sides of the shed, set 2 feet back from the front, and then use new lumber to just match the monopitch all the way across the back.

Let's back up a little bit. In April of 2019, I came across a listing for a couple pallets of old road bricks from a farm for just $90.


Jumping to September 2019, when summer activities had simmered down and I was ready to at least start something with the barn - in order to pull this off, I'd need to create a foundation both to hold the walls, and to contain the bricks. My friend Matt's dad has a loader, but borrowing it meant we had to re-deck his trailer - a fair proposition, so a full day, 6 broken drill bits and a makeshift ramp bracket made out of an old bed frame later, we were able to get the loader to the dig site. The hope was to make a wall that was 5 cinder blocks high -  2 in the ground and 3 above grade to raise the ceiling from 6' to 8'. The shed is built this way, with 3 layers of block in the ground, so it was nice to just use that as a guide as to how deep to dig. 


The best thing about it was finding all the crazy stuff buried back here. From manual lawn mowers to Taco Bell name tags, tee shirts to paint cans, and a lot of tile and broken concrete pieces, the kids had a riot sifting through the dirt pile.

As with anything on this project, I was determined not to buy new cinder blocks. I found some on Craigslist for cheap, so I drove out to yet another farm to pick them up. 


We measured, and measured, then measured again, then set a string line from the shed to start our first line of block. Raf, my guitarist in Charles the Osprey, and I traded off setting the blocks and cleaning the blocks. Because the bummer of getting used blocks is that they come with dried mortar all over them, so you have to break all that off. So for 120+ blocks, we had a system of just drumming on them with two hammers - mortar is brittle and doesn't bond to the block well, so breaking it without damaging the block is pretty easy, though tedious.


By the end of October, we'd set our first layer of block, but by that time it was too cold to use mortar, so we decided to leave the rest till spring. I was bummed we hadn't gotten further in the project, but had to admit that it didn't make sense to fight the cold and keep going.

As winter tore on, all the barn materials sat on trailers and pallets, all under tarps, under mounds of snow. All the while I hoped they would survive and not rot away. Also as winter progressed, and my job got busier, the Coronavirus (COVID-19) pandemic was also ramping up, and no one had any idea what was about to happen. By mid-march, cases were ballooning across the world, and especially the United States, and we lost the last three of our shows of the season and were sent home to isolate from the growing threat of disease. Since EVERYONE experienced the pandemic, I don't need to spend time on it here, other than to say I suddenly was working from home, so working on the barn suddenly became a great distraction.

April 2020 became the start of an amazing transformation. 

I didn't take many pictures of the second layer going on, since working with mortar is a real pain, and I swore several times I'd just hire someone to do it cause I was no good at it, but luckily Raf and Becky were willing to do it as well, so by the end of April we had two layers done. By that time, I'd decided to just raise the ceiling height with lumber instead of block. Calculating the amount of wall stud I'd have left after building the wings, I'd determined we'd have enough to create that extra 2' extension.

Also not shown is us mixing concrete and pouring it into the holes in the block. You can certainly leave the block open, but considering the fairly poor mortar job we did, I didn't want to have moisture or vegetation problems seeping through the cracks, so I decided to just make it a solid wall. This also allowed us to put J-bolts in at intervals to tie the walls to the floor.

Next up was creating the brick floor. Something I'd been looking forward to for over a year. To create the base, I put dirt back into the frame, then had to add 4" of crushed concrete, and then sand on top of that. Now, to be honest, I forgot the sand part at first. So I ended up putting in about 5" of crushed concrete and then taking about 1" back out when I realized leveling just crushed concrete is nearly impossible. That's what happens when enough time passes between research and execution!

I ran my dimensions through a cubic yard calculator and ordered 7 yards of crushed concrete, delivered to our driveway.

We leveled and hand-tamped the dirt level in preparation for the gravel. I then measured and snapped a chalk line one brick depth from the top of the block wall so I knew what to fill to. Since we no longer had a loader, I moved the pile of crushed concrete by wheelbarrow, about 200 feet at a time, to the site, in about a week, just working on it a little bit each day.

By now it was nearly June, and the weather was great for working outside, so leveling and tamping and releveling was a chore, but it wasn't terrible. We started leveling with a magnesium screed board (borrowed from a landscaper friend, Corey) and a hand tamp. Then we rented a plate compactor to make sure it was REALLY compacted and ready for the brick.

Once we got a level ground, we were finally ready to lay some brick. I started with just a test row, to see how it would look before putting down the vapor barrier. With wanting to use a spray foam insulation and no venting, we had to make sure that no moisture from the ground would come up through the floor, so using a vapor barrier and eventually sealing the bricks will help prevent mold from forming.


Once we liked the pattern, laying the brick went very quickly.


Once the bricks were all in on both sides, the plan was to pour bags of dry concrete on top of the bricks and push broom it into the cracks, much like you'd do with sand on a patio, and then water it to set the concrete. It worked so much better than I'd hoped. I really thought it would sort of gray-wash the bricks, and it did a little bit, but the color still pops luckily, and they're all fully locked into place.


Now, I ran out of bricks so I couldn't do both sides fully, so the plan on what to do about that will shift over the coming months, but for now I just left it with the vapor barrier, needing to move on to bigger and better things. 

Next up: WALL REMOVAL!


The Wolven House Project Copyright © 2012