
This year, we decided to finally build a structure in the back yard to house all music related things. I've been drawing up plans for the better part of Spring/Summer, trying to figure out the best way to do it, and every iteration has had it's challenges, expenses and limitations. Then one day, I stumbled upon a Facebook Marketplace post.

This person was looking for someone to tear down and remove a 100 year old barn from their property. The listing was for $800. I couldn't resist going to look at it. I drove down to Lake Odessa, MI to take a look. I was hooked immediately, and started thinking of the logistics involved in removing it.
It's 14'x28', and the ceiling is only 6', so it seemed feasible without heavy machinery. As a practice space, the room is the right size, if I can just raise it two feet with a concrete block wall.
I offered $600. They dickered, but because they had to have it removed within the next 2 weeks, they settled on my offer. So on July 17, I brought two friends to help me tackle the disassembly.
We started with the interior. There were wall and ceiling boards that were clearly garbage, and probably covered in animal byproduct. Upon removing them, we realized the wall construction was traditional 2x4 wall construction on 24" centers, instead of pole barn style construction, which was great. I was also supposed to take the entire structure, but the farmhand on site was gracious enough to let me leave the trash boards in a pile in the middle of the room, since all I was going to do was bring them home and burn them.
There were some boards secured with bolts that had long been rusted, but a sawzall takes care of that pretty quickly.

After the wall boards were all down, the roof steel seemed like the next logical step.
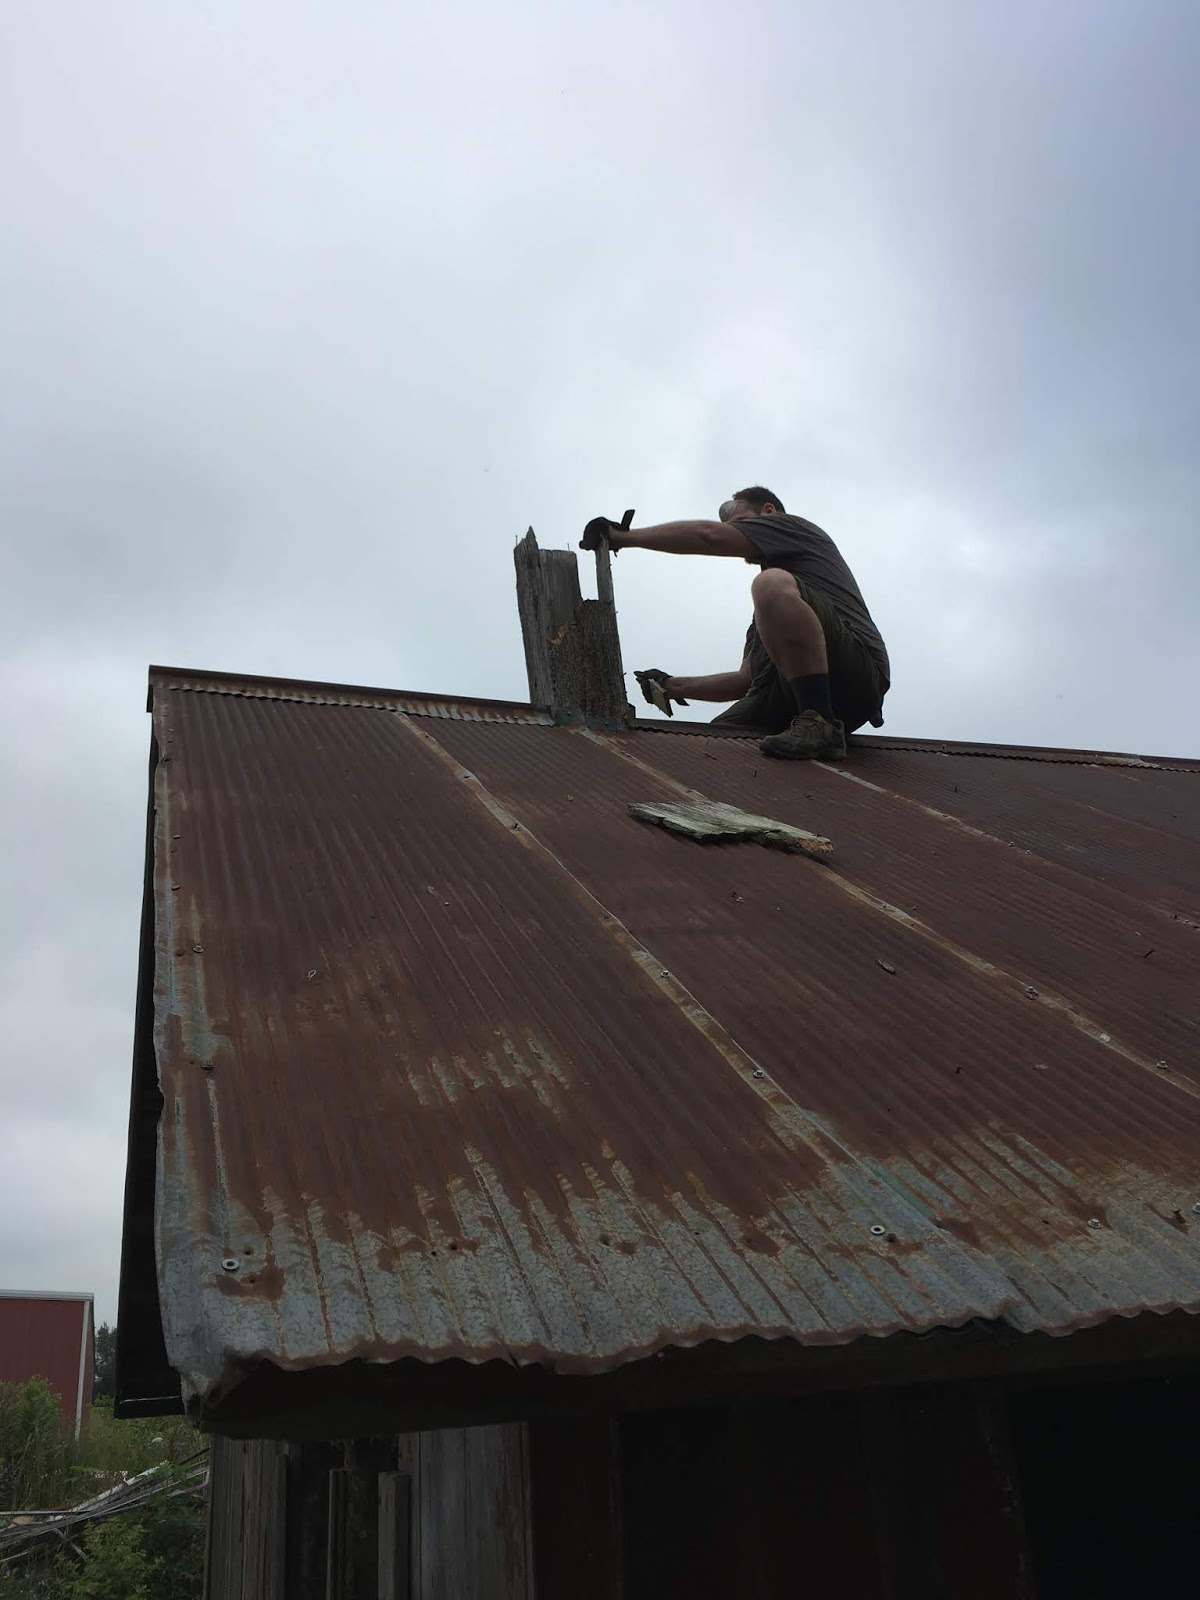
With two of us on the roof and one on the ground, we were able to get all the steel off in the first day. We draped the Little Giant Ladder over both sides to stand on while we pulled out nails with a hammer and a Super Bar. Some of the roof pieces were secured with hex screws, so a drill and hex bit was needed. But with the sun out and the heat index at about 100 degrees, we called it quits at about 1pm.
I left the site that day feeling a bit defeated and hopeless - wondering how in the world we were going to accomplish this. I felt like we hadn't progressed enough, and that the remainder of the job was so daunting that I wanted to bail or find professional to do it. I cooled off, calmed down, and got my head back in it. I'd done crazy things before, but this was by far the most ambitious, but I still felt like I could pull it off. Even if it took more time than planned.

The following week, we came back to continue the disassembly, starting with the roof again. The boards were all nailed in, so an 8lb sledge slamming on the boards from underneath proved to be the most effective method. I brought a bunch of leftover 3/4" plywood panels to lay on the joists inside for us to stand on, instead of trying to balance on the joists or stand on a ladder on a pile of rubble.

Some of the boards were 16' long, so it was a tedious and exhausting job that the three of us rotated - two on the ground pulling nails, one in the rafters pounding boards.

The next step was to figure out how to pull the joists and rafters down, and whether to keep them assembled. It was clear very quickly that pulling them apart was the smartest way to go. I labeled each joist and rafter, starting with 1 on the left and 2 on the right of the first joist, and worked my way back. Then we slammed up on the end with the sledge, and then over on the rafters to separate them from the joists. We laid each on down, leaving them up on the walls so that the next one could fall back onto something instead of crashing down on us. It all went pretty quickly.

By 10am, we had all the joists and rafters down. I was starting to feel like this was actually possible!
We knocked the ends in so as to not damage the siding, got those down and split them in half and stacked them, leaving the siding on.
Next we had to determine how to drop the walls. Always the voice of reason in this process, my buddy Matt thought the best way was to just sawzall them in half, leave them as panels, and transport that way. Much easier than taking all the siding off and trying to disassemble the walls. So that's what we did. The ends were cut at the doorways, and the side walls split almost exactly in half.


After a lunch break, we dropped all the walls, and the whole thing was down by 1pm. We commenced stacking all the pieces for later transport, and called it a day.


Two days later we brought a 16' car trailer back to take the first load. Luckily, they had a giant John Deere loader, so loading from the farm was a breeze. Back at home, we unloaded and restacked all the boards by hand. The next day, we loaded all the walls, intending for them to stay on the trailer till we actually reassemble.

I'm impressed with how efficiently we made this all happen. Huge thanks to Matt, Patt, Raf and my father-in-law Paul for all their help in the takedown and transport. Would never have been able to do it without them. Especially Matt, with his practicality, farm smarts and willingness to work till it's done.
But now comes the hard part - putting it all back together!


