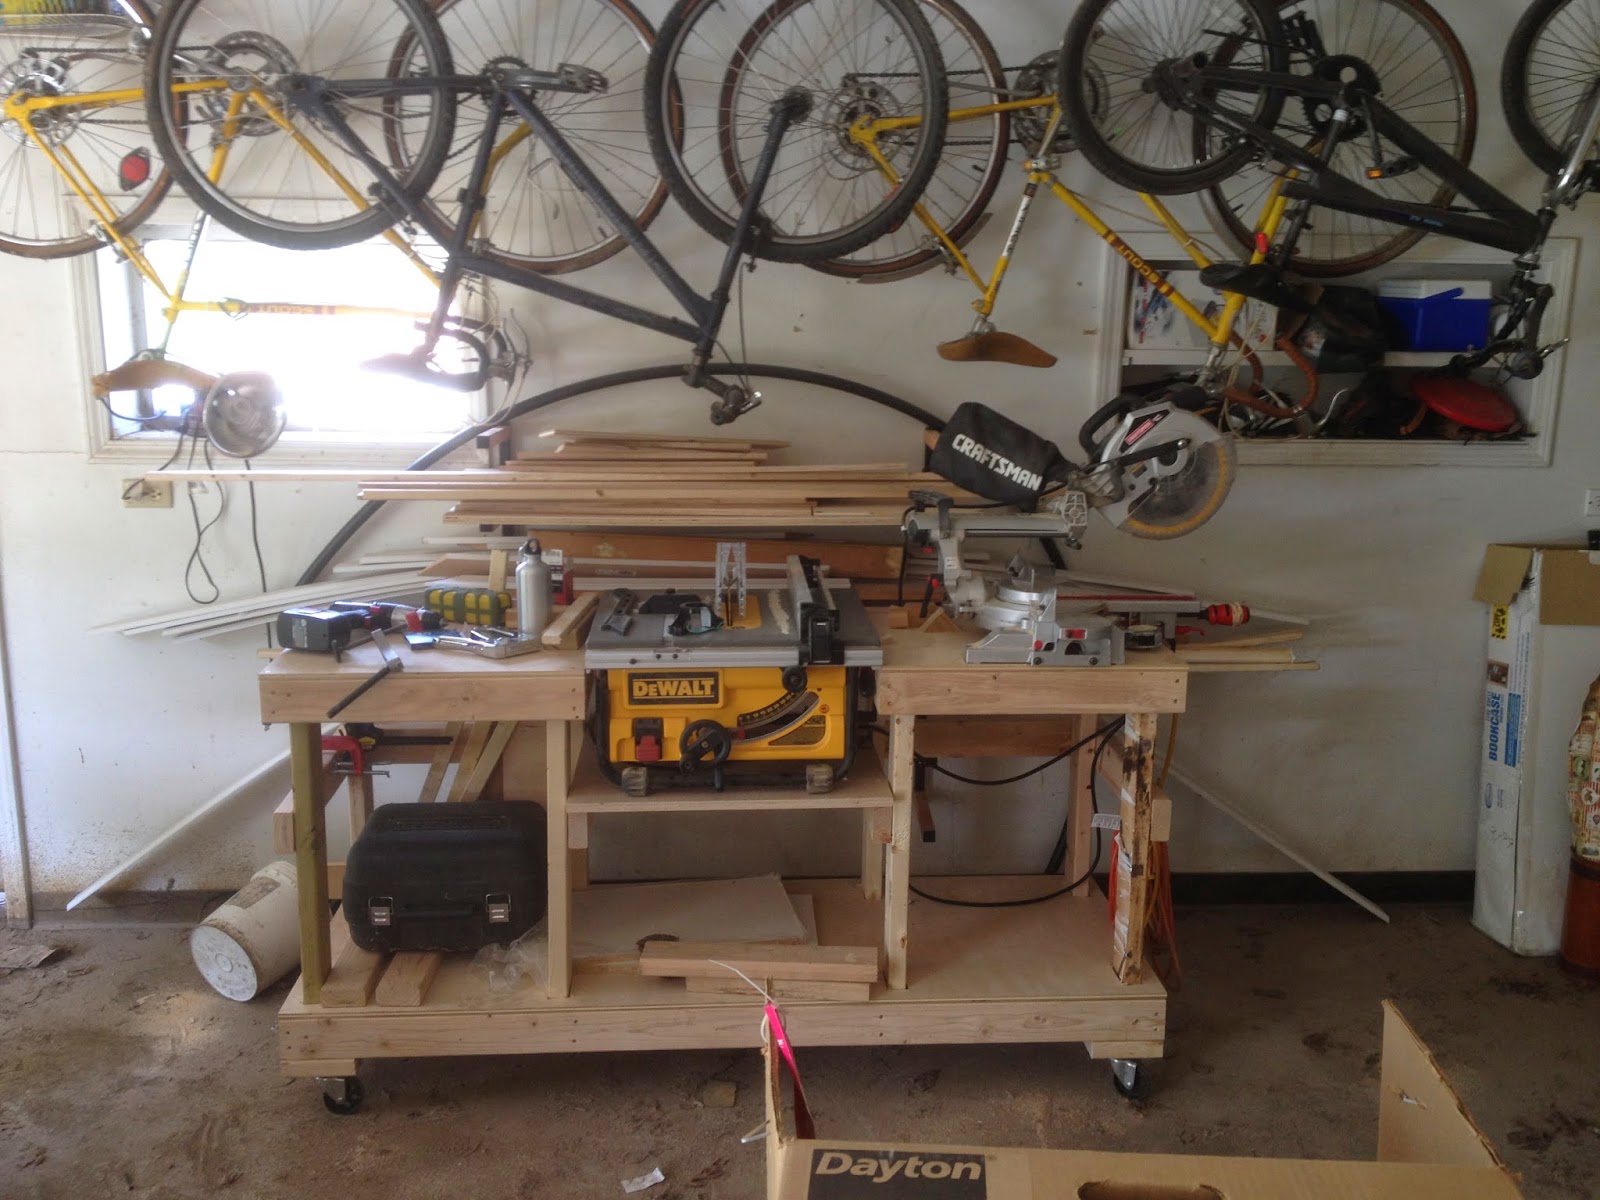
At some point, I used an old coffee table mounted to an old laundry room cabinet as a stand for the miter saw, but it was so narrow that it was hard to keep stable, so I've wanted to create a bigger version that would work for both the miter and table saw.
After looking online for some plans, I found a couple of ideas, but most were way too elaborate (drawers, lighting, steel top with extra fence, etc.), so I decided to just take the same concept from the 2x4 Garage Shelves and build a simple but sturdy stand.
First, I needed some casters. I went to Repocast.com, an online auction site which is a dangerous place when you don't have a clear idea of what you're looking for - you could end up with a pallet of random items and an '84 Buick that doesn't run, but when you know what you're looking for, it can be perfect. I found a set of 4 heavy duty cast iron casters, all with ball bearing swivel, and bid $20, hoping to get them for less than $50. The auction closed with me as the high bidder at $20, which is ridiculous, cause they're usually around $20/wheel.
Next, I needed all my materials. I had a bunch of 1/2" and 3/4" plywood left over from other projects, so that was covered, and all I needed was nine 8' 2x4's and a box of self-drilling wood screws. In the end, I could have used eleven 2x4's, but I probably also could have planned my cuts better and gotten less scrap, but since I was kinda winging it anyway, there was no way to figure that all out.
Here was the concept- a three-section system, where there are two columns on the outside, and a shelf in the middle section that the table saw sits on. The two columns would be on the same level as the table portion of the table saw.
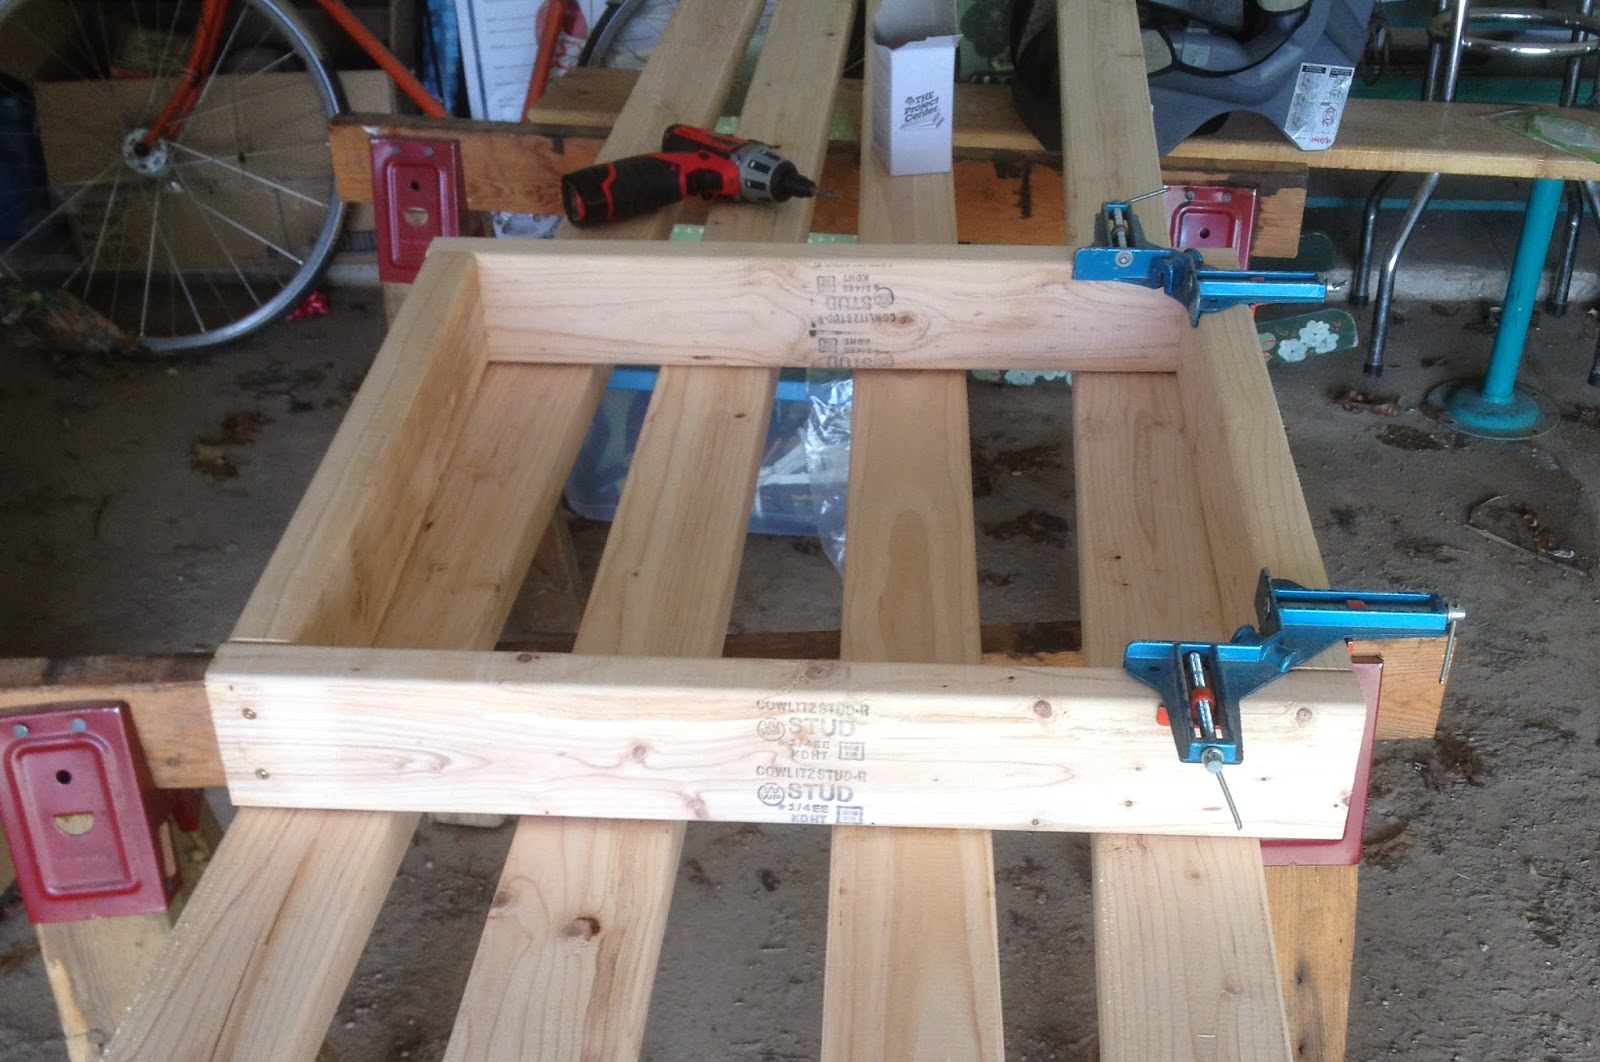
I started by building the column surrounds. These would, just like the 2x4 shelving, create the shape of the column for the upright 2x4s to attach to. I made them 24"x24" square, so the overall length of the piece would be under 6'. Each surround is made with two 24" and two 21" 2x4s, 4 screws on each side. If you don't have 90 degree clamps as seen in the photo, I highly recommend it. Makes getting things square a MUCH easier process.

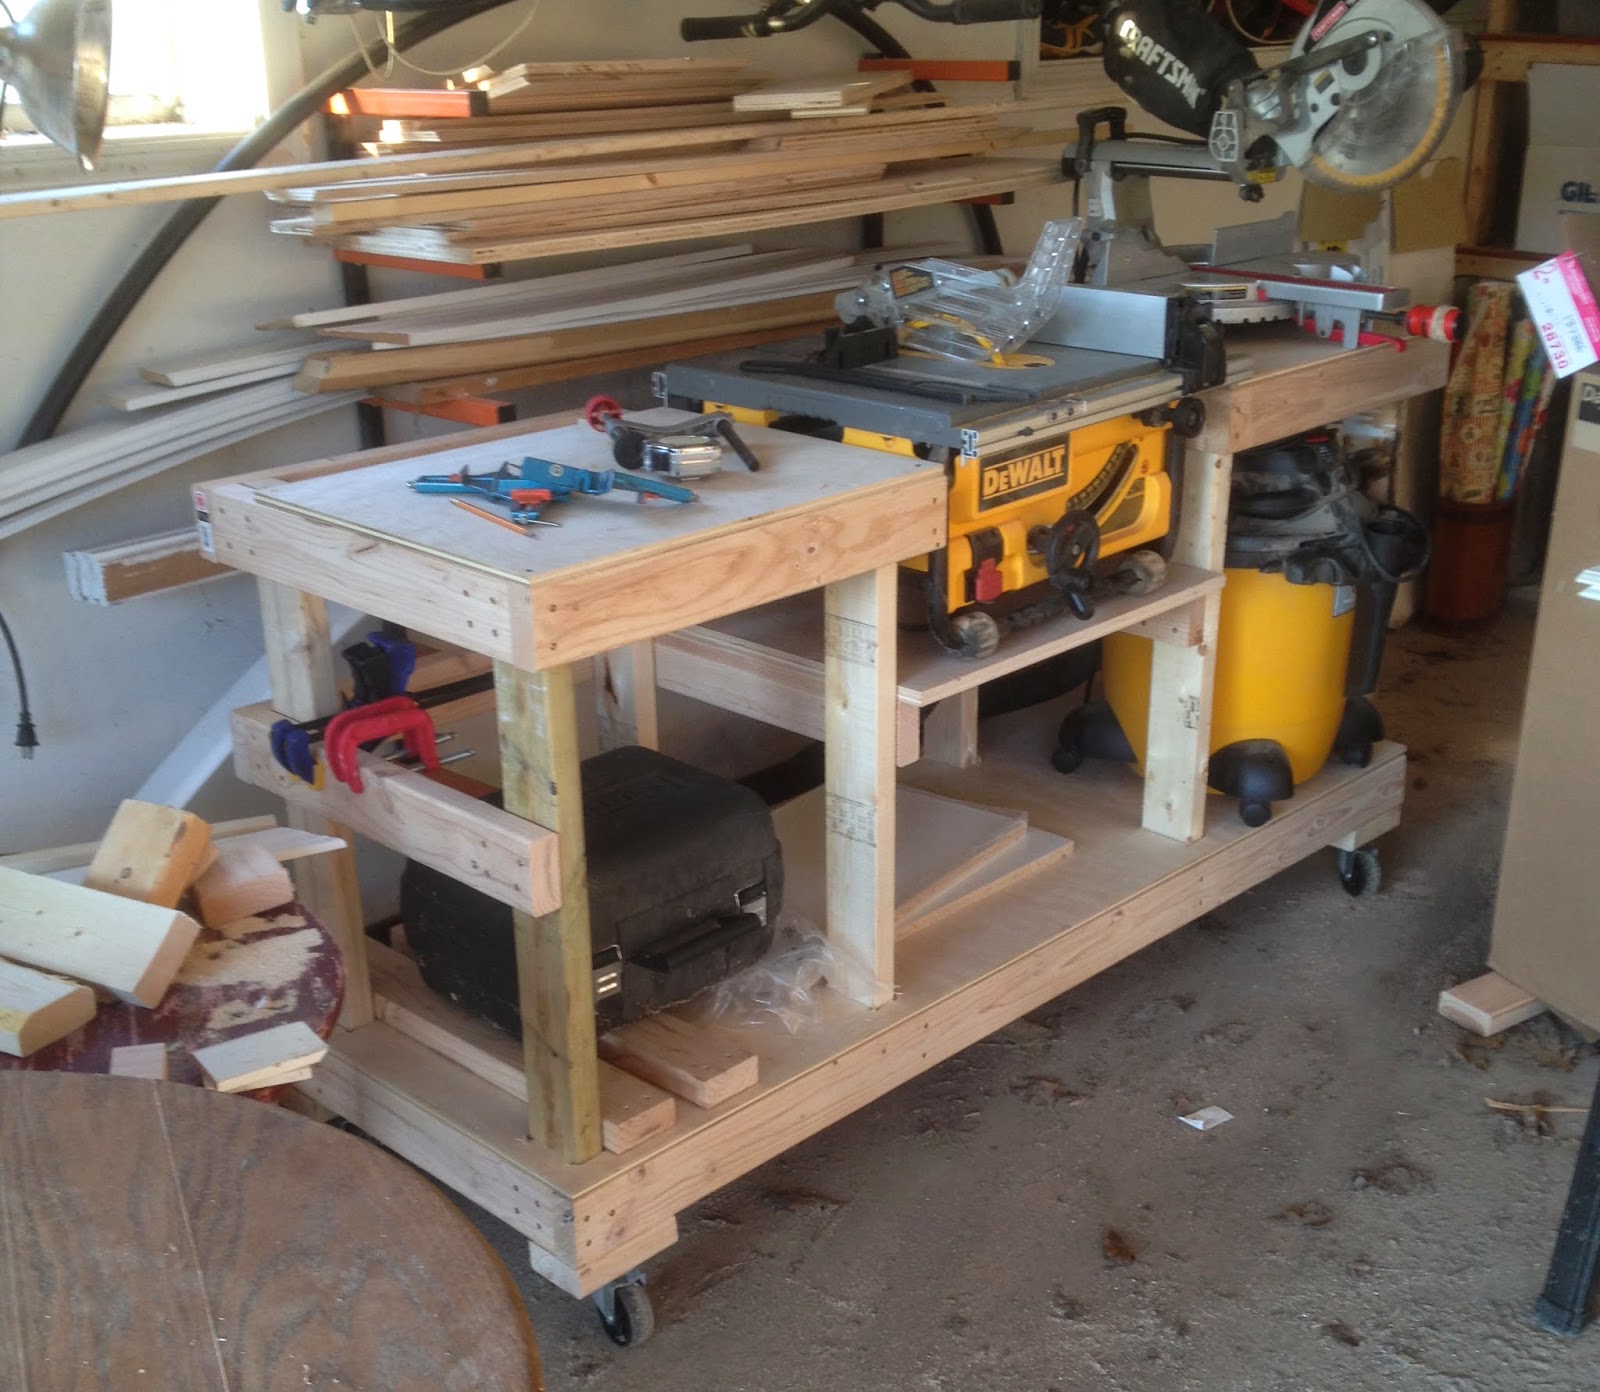
After building 4 surrounds (2 per column), I built the base. To get the measurement, I summed up the two column widths with the width of the table saw and came up with 70.5". Same concept as the surrounds, I used two 70.5" boards and two 21" boards and screwed them all together. I then added some small 2x4 scrap pieces for the casters to attach to, and added my first column vertical support. Again, to come up with that measurement, I just determined how tall I wanted the overall piece (about 34"), and measured from the bottom of support structure, minus the casters, to where the table would rest.
At this point, my father-in-law came over to help, so I didn't take as many photos of progress, since we were on a roll and kept forgetting to pause. But here's what happened - we added the rest of the four corner posts, and then added two cross section pieces at 24" in from the ends to attach the middle vertical supports in. Then we added a 1/2" plywood base to the bottom:

It was an afterthought to actually cut them out as holes instead of just chopping the corners out, so here's how we did it. We temporarily attached a column surround to the top of each column, so that the 2x4s would be in the correct place - otherwise, they have a bit of a twist or bend to them, and could be slightly off. Then we laid the 1/2" plywood on top, traced the locations, drilled holes in each corner of each cut out, and jigawed them out. Then we took off the surrounds, slid the 1/2" plywood down, and it fit nearly perfectly.
Next, we had to measure the location of the middle surrounds, so that the table saw would be at the right height and seamless with the top. We took our calculations, screwed them into place, and tested it out.

Here's where I realized I'd made a mistake. Between concept and execution, I'd changed the depth from 19" (19"? That's too narrow - I need it to be more stable - 24"!) to 24", forgetting that the fence runners needed to get on either side of the top. So, our workaround, shown above, was to make the tops only 19" instead of the full depth. This also means that I'll have to raise the 19" part a couple inches to match the table height, but for now it works fine. It also provided some space to just brush sawdust and scrap into a specific section, and potentially into some kind of bag or receptacle instead of onto the floor. A happy accident for sure.

Next we added the casters.

Then the table saw to test the fence clearance. It worked great. As you can see, the tops need to be raised to meet the actual saw top, but for now it's fine. After getting it together, I realized I wanted to take the front supports off the middle surrounds so I could store the shop vac, and maybe a can.
The final product - The idea is that the table saw could be lowered to the bottom to allow for the column to be used as a miter saw table, but I have yet to design that portion of it. I did fit the shop vac in that spot, added a power strip and extension cord with a storage hook, and will develop a receptacle for the scrap on the left at some point. BUT, for now, it's better than it just being on a stationary round table in the garage.